# Overview
Locoia is the low-code all-in-one iPaaS solution 🛠️ for companies of all sizes⚡
Welcome to Locoia's documentation :page\_with\_curl: You will find everything you need to know to get started with Locoia as well as the in-and-outs of the platform.
{% content-ref url="/pages/-Mcyimjm7R7fLFkX9Inl" %}
[Automation](/automation/flow-builder)
{% endcontent-ref %}
{% content-ref url="/pages/-Mcye2CObGtdKgG10j-o" %}
[Connectors & Helpers](/connectors/connectors)
{% endcontent-ref %}
{% content-ref url="/pages/-McyjDiY1AIIOt-XGv8a" %}
[Embed - White Label Portal](/embed-white-label-portal/embed-admin-setup)
{% endcontent-ref %}
{% content-ref url="/pages/-McyjJq9d-1XXzp9aHg3" %}
[Data and Dashboards](/data-and-dashboards/dashboards-and-insights)
{% endcontent-ref %}
{% content-ref url="/pages/-MdTGaNs\_4S0qs4QBNP4" %}
[Best Practice Guides](/best-practice-guides/integration-best-practices-and-considerations-before-starting)
{% endcontent-ref %}
{% content-ref url="/pages/-Mcyjcb3Uo7igTQNgtPh" %}
[API](/api/authentication-with-our-api)
{% endcontent-ref %}
# Account and User Settings
## Account settings
When logging into your account for the first time, you can click on the **avatar** in the upper right corner and visit your **user profile** and then your **company profiles** :office: to upload logos, images and correct your user data.
Additionally, Locoia can set the desired default data retention period for you. All automation flows that you will create will by default have that [**data retention period**](/automation/flow-builder/flow-run-data-retention-and-logging). It can be customized on an individual flow.
Update your [user account](https://app.dynamicinsight.com/#/user-preferences) and [company details](https://app.dynamicinsight.com/#/company-preferences) like name, email address, phone number or address, anytime by following these steps:
1. Click on the **burger menu** in the upper left side and open the side-panel or just clicked on the minified icons.
2. Under **settings** click on the type of setting you wish to edit, Connector Auth, Users of your account or company details.\
\
[](https://s3.amazonaws.com/cdn.freshdesk.com/data/helpdesk/attachments/production/48000408451/original/_3ClE8mQ9DJe69DwpRK4oriubik7Re8tvQ.png?1561297085)\
3. You can **add**, **edit**, and **update** in each respective section. Updates should take effect immediately.
## User settings

## Company logo

## Company colors

# User types
Users types and their permissions
There are two different types of users:
## **Company Admin (accountAdmin)**
Company admins have access to **all** records within the company regardless of their permissions for the corresponding record.
Furthermore, they have access to company-related functionalities:
* Company preferences
* [Create](/account-settings/adding-new-users) and edit users
* Activity log
## **User**
Users have create, view, update, and delete access to all records where they have the corresponding permissions.
# Adding Users
## Adding new users to your company
To add a **new user** to your company, you have to be a [User types](/account-settings/user-types#company-admin-accountadmin)\
Go to [**Settings** - **Users**](https://app.locoia.com/#/settings/user) and click **Add**. Then add the user details and click on **Confirm**:

The User will then receive a temporary password via Email:

With the temporary password, the user can log in and has to change their password.
{% hint style="warning" %}
For security reasons, the temporary password expires after 24 hours. If the user has not logged in within that time, please delete the created user and create a new one, so that a new temporary password will be created.
{% endhint %}
## Bulk user creation and uploading
As an admin, you can also upload multiple users in one go. To do this, go to the [Flow Marketplace](https://app.locoia.com/#/flow-marketplace) and choose the **Bulk User creation based on Spreadsheet (XLSX) or CSV** flow copy it. Next, upload the below table example in an XLSX or CSV format under the [File Uploader](https://app.locoia.com/#/settings/file-uploader). It is important that you keep exactly the same headers and don't have any spaces in the header cell.
Give the file the reference name userUploadFile:
| title | first\_name | last\_name | company\_id | email | user\_type | phone | status |
| --------- | ----------- | ---------- | ----------- | ------------------ | ------------ | ------------ | ------ |
| Developer | Max | Miller | uuid4 | | user | +49123456789 | active |
| CTO | Frank | Underwood | uuid4 | | accountAdmin | +49222456789 | active |
Afterward, check out the example of how variables are passed to the connector and just set up your [Connector Auth](/connectors/authentication/setting-up-authentication) for Locoia. Afterward, run the flow and your users are all created in bulk in just a few seconds.
# Teams
What are teams? How to use them?
Teams are **groups of users** who are created by an **account admin**. Creating teams allows users to process various activities such as **sharing** permissions to flows or dashboards with a relevant group of users.
### How to create teams?
1\. Under the menu **Settings** > **Teams**, in the upper right corner, click the button **Create Teams**.
2\. Give your team a name and add users to it searching them in the select box.
### Where to use teams?
Teams can be used to give **permission (access)** to for the following objects:
1. Flow Builder and Debugger Views
2. ConnectorAuths
3. File Uploads
4. EnvVariables
5. Dashboards
6. Insights / Transformations
7. Data Sources
8. Embed (special product that needs enabling)
For a full overview of permissions, see [here](/account-settings/access-permissions).
# Access Permissions
Many companies require access on a "need to know basis" in order to limit the access of flows, dashboard and other information.
The account admin role is allowed to create object permissions to either make an object (flow, dashboard, etc.)...
* ... publicly available for **all accounts** on Locoia,
* ... publicly available within a users **own account (company)**,
* ... **restrict** it to a certain set of **users** or [**teams**](/account-settings/teams),
* ... or make an object **private**, so that it is only available to the user.
For each object, there are four permissions to be set:
* **Reading** - viewing an object
* **Updating** (writing) - Updating an object
* **Deleting** - deleting an object
* **Managing** - managing permission for an object
### How to create object permissions?
Object Permissions can be set on the below objects:
**Automation**:
* Flows (also applies to the Flow Debugger view)
* Files (Uploader)
* ConnectorAuth-(authentication)s
* EnvVariables
**Dashboards**:
* Dashboards
* Insights
* Data Sources
[Teams](/account-settings/teams) can be used to give **permission (access)** to automation Flows or Dashboards and Insights easily.
# 2 Factor Authentication 2FA
Two Factor Authentication in short, 2FA, is enabled by default for all users as per our logic considering a user's activity as per the parameters IP, User Agent and Location as risky. If someone usually logs in London and then - all of a sudden in another city or with another IP or location shortly after, the user will be asked for 2FA via SMS.
If the users activity is not considered risky, s/he wont be asked for the 2FA. We generally recommend to use unique passwords everywhere and also to make them as long as possible.
In addition, we inform based on risky logins with:

# Versioning and Snapshots
Versioning and snapshots allow you to revert back to a previous version of your objects (e.g. Flows, etc.)
1\. For easily reverting and rolling back to an old version, you can just click the "Versioning history" button:
Versioning button
2\. Select whether to `Copy as a new flow` or `Restore` a previous version:

Versioning history is available for the following objects:
* **Automation**: Flow Builder, Env Variables
* **Data and Dashboards**: Dashboards, Insights / Transformations, Data Sources, Forecast
# Activity Log
The Activity Log logs all changes made in your Locoia Account
The Activity Log is visible to Account Admins and can be found under [Settings > Activity Log](https://app.locoia.com/settings/activity-log).
It logs the meta information of all modifying requests (`POST`, `PUT`, and `DELETE` requests):
* Datetime
* Endpoint
* Method
* User ID
* User Agent
* IP Address
# Reset your Password
Reset or forgot your username or password
Should you have forgotten the username or password, please click the [**Reset password** ](https://app.dynamicinsight.com/)button in below the password input field. You should then receive instructions via email on how to reset and renew your password.
Login screen
To reset a password, a user needs to have first registered once successfully.
## Forced password reset
Locoia can **force all users of your account to reset** their passwords. Thus, they will not be able to access their account anymore until they reset their password. This is the more secure way if you want to enforce an **immediate password change**. To do so, please contact our support and we can enable this on short notice.
# Invoices and Payments
**Invoices and payment options** can be found under your *avatar* > *Your company name* > the tab on the right side. Locoia allows payment of the [subscriptions plans](https://www.locoia.com/de/preise-automation/) via SEPA or credit card. When logged in to your account you can access the Invoices & Payments section in your [Accounts settings](https://app.locoia.com/#/company-preferences) to:
1. Check your invoices and payments
2. Update your invoice company information, such as address
3. Enter your **credit card details** or your **SEPA** banking details
Some of the links will redirect you to our payment provider, Stripe. This is one of the largest global payment providers, and the portal is hosted by them; it is secured, and only you can access it.
Note, if you enter your credit card details, you will find them in the payment portal stored. If you enter your SEPA details, you will not see them again. They will be safely stored by Stripe (PCI-compliant), and the option to enter credit card details will be removed.
Upon entering either of the two payment methods, we will be notified and setting up your subscription automatically in the background. You should receive a notice and invoice within the next two business days.

{% hint style="info" %}
Only the user type ***Account Admin*** can see the *Invoices and payments* tab. Regular users don't see it. Should your account not be activated for payment yet, e.g., because it is "pending" confirmation or still in "testing" mode, you will not see any payment options.
{% endhint %}
# Flow Builder
Everything you need to know about building flows in our Flow Builder!
When you enter the flow builder for the first time, you might feel a little overwhelmed by the heaps of functionality. No worries, **we got you covered**!
**All features are here for a reason**, and you will quickly be able to harness their full power. This section serves as your go-to guide - whether you can't quite figure out how to do something, or just want to refresh your memory.

## **Sections**
{% content-ref url="/pages/-MczX39T0LL7IO4adg06" %}
[Connectors & APIs](/automation/flow-builder/connectors-and-apis)
{% endcontent-ref %}
{% content-ref url="/pages/-MczWTIShjYf-\_lCCN2r" %}
[Text Strings, Date & Time, Numbers and Currencies](/automation/flow-builder/smart-data-wrangling)
{% endcontent-ref %}
{% content-ref url="/pages/-MczJ6AfqJxjRHo0R5Oc" %}
[Referencing data of objects, lists, arrays - how to pass data dynamically](/automation/flow-builder/connectors-and-apis/referencing-data-of-dicts-lists-arrays-how-to-pass-data-dynamically)
{% endcontent-ref %}
{% content-ref url="/pages/-MczOxKA359ZI\_c\_G129" %}
[Jinja: (Custom) variables, wildcards and functions](/automation/flow-builder/jinja2-template-language/using-custom-variables-wildcards-and-functions)
{% endcontent-ref %}
{% content-ref url="/pages/-MczKIayKw817RYlX1Fn" %}
[Flow Building Best Practices](/automation/flow-builder/flow-building-best-practices)
{% endcontent-ref %}
{% content-ref url="/pages/-MczPhndIY2nT1Sspjxz" %}
[Flow run data retention, logging, and error notifications](/automation/flow-builder/flow-run-data-retention-and-logging)
{% endcontent-ref %}
# Flow Building Best Practices
Learn how to build robust and scalable flows.
## Getting started with the basics
### Flow status
Once you start building a new flow, its status is always **draft.** In this mode, you can build, debug and test. Once ready, set the status to **active**. Once a flow is set to active, the scheduler will actively schedule and execute flows. This is not the case in **draft** or **paused**. So the status active should always be used for all actively running flows. If a flow throws multiple errors or you want to actively prevent it from executing use the status **paused**. You can change the status in settings:
### Flow triggers
There are several ways to trigger (run) a Flow:
1. Manual trigger - Clicking the "Run Now" button on the [Flow Builder](/automation/flow-builder) (visible in the screenshot above)
2. Schedule trigger - via [Schedule Helper](/connectors/helpers/scheduler-helper)
3. Webhook trigger - via [Webhook Helper](/connectors/helpers/webhook-helper) or [Connector Webhook Trigger](/connectors/webhook-trigger-for-connectors)
4. Flow triggering another flow - via [Flow Trigger](/connectors/helpers/multi-flow-trigger)
### Naming flows
Always include your **initials** MM for Max Miller as well as a date or version in the flow name: "Salesforce contacts sync with Zendesk MM 04.03.2020", this makes it easy for everyone in your team to quickly recognize who built the flow and whether it's up to date.
### Default values
In order to easily check for variable existence and default to an empty string, use this pattern:
```python
{{ property.country | default() }}
```
This defaults to an empty string if the field/value for country doesn’t exist.
```python
{{ property.country | default("Germany") }}
```
This defaults to `Germany`. This is particularly useful when dealing with an ERP System for example, and your Sales team only filled the country field when it's not Germany.
### Further best practices
* Include some comments in the **description** of the Flow under the edit button for everyone to know what the flow is about
* Edit each individual **Connector description text** on the workspace to tell others (or yourself when you return a month later) what each step does
* Improve the short references (e.g. zen1 for Zendesk); ideally, rename this to **zendeskContacts** or **zendesk\_contacts**, depending on your preference of camel case vs. snake case
* Once a flow is ready to be deployed, set the status to "**live**" to let everyone know it is ready to go
* Reduce the flow in its components and try running (debugging) one step at a time rather than building everything at once. Once the first steps work, add in more functionality.
* Initially, use test-data sets that are rather small, just to test the functionality of each step properly. For CSV, XML, or JSON files you can e.g. upload test data to AWS S3, Google Drive, or Dropbox and use them. If you query a REST API, try filtering e.g. by date range to keep the data set small.
* Look at other flows you already built or find in a template on the [Flow Template Marketplace](https://app.dynamicinsight.com/#/flow-marketplace).
* If you send emails, only send them to yourself for testing purposes.
* If you need more space, you can zoom in and out by pressing the `CMD` key on a Mac or the `CTRL` key on a PC and zoom in or out with your mouse.
* You can copy individual connectors just by `CMD`/`CTRL` + `C` and `CMD`/`CTRL` + `V` after clicking on a connector. It will copy it including all its settings.
Copy-pasting a step
* `CMD`/`CTRL` + `Z` and `CMD`/`CTRL` + `Shift` + `Z` can be used to revert graphical adjustments in Flows (moving connectors and helpers on the flow builder canvas)
* Once a Flow is ready to run, in the **Flow Builder edit dialog**, include a list of comma-separated email addresses you want to be notified in case an error occurs during execution.\

## Advanced best practices
These best practices are most likely not relevant when you get to know the app at first, however, they will come in handy once you build larger flows, such as multi-entity import flows.
{% hint style="warning" %}
The maximum data of each step output is 50MB, in case this limit is reached, the step will fail with a message pointing out the size.\
Talk to us if this limit is not sufficient for your use case.
{% endhint %}
### Splitting large Flows into Sub-Flows
Once your Flow grows to cover more edge cases, do more complicated imports, or handle a variety of data sources, you should think about splitting your Flow into smaller Sub-Flows using the [Flow Trigger Helper](/connectors/helpers/multi-flow-trigger).
This has multiple advantages:
* Different parts of the Flow are clearly separated, which makes it easier to see at a glance what each Sub-Flow does and to troubleshoot it
* You are able to reuse Sub-Flows across multiple Flows, which reduces maintenance and prevents differences across Flows (e.g. you have to do the same 10 steps for multiple different Flows, instead of copying the steps into each Flow, you create a separate Flow for it, which will be triggered by the other Flows)
* Performance of your Flows can be increased if you trigger Sub-Flows "async" (e.g. within a loop), as then multiple Sub-Flows can run in parallel
### Preparing large datasets before looping over them
Often it makes sense to do some data preparation with Helpers that handle large datasets with ease such as the [Spreadsheet Helper](/connectors/helpers/spreadsheet-helper) or a Jinja Loop with the [Dict Helper's Define Variables action](/connectors/helpers/dict-helper), before looping over data and doing the same operations for each iteration instead of once beforehand.
#### Example: Mapping of multiple flat files
A typical importing scenario is that data from flat files (e.g. CSV files) should be imported to a system via a regular Connector.
However, the data that should be sent in a single API call might be spread across multiple flat files, thus some mapping needs to happen in order to import the data to the system.
Let's suppose the API expects data in the following format, where the main dictionary is company data and inside of it, a list of company addresses should be present:
```json
{
"id": "...",
"name": "...",
...,
"addresses": [
{
"street": "..."
...
},
{
...
}
]
}
```
One could achieve this by building a Flow like this:

The following is happening there:
1. Data is read from the CSV files
2. A loop iterates over the companies
3. Addresses are filtered for the addresses of the company
4. Another loop loops over the addresses themselves and prepares them in the expected format
5. Inside the last step, the company data is prepared, with a reference to the address loop and a request to the API is sent in order to create the company
This means that for each company, the entire company's address data is first loaded again, to be then filtered and finally looped over. For one iteration this might take only a few seconds (dependent on the size of the company address data file; for large files, some performance improvements can be already gained by using the [Spreadsheet Helper's Query Spreadsheet action](/connectors/helpers/spreadsheet-helper#query-spreadsheet)), but this quickly adds up for each iteration.
Instead, this should happen directly in a Dict Helper with the Define Variables action before the loop:

Inside the Prepare Company Data step the following is happening:
```django
[
{% for company in companies %}
{
"id": "{{ company.id }}",
"name": {% if probe(company, 'company_name') %}"{{ company.company_name }}"{% else %}None{% endif %},
...,
"addresses": [
{% for address in companies_addresses | selectattr('company_id', '==', company.id) %}
{
"street": {% if probe(address, 'street_1') %}"{{ address.street_1 }}"{% else %}None{% endif %},
...
}
{% if not loop.last %},{% endif %}
{% endfor %}
]
}
{% if not loop.last %},{% endif %}
{% endfor %}
]
```
Which results in a list like this:
```json
[
{
"id": "...",
"name": "...",
...,
"addresses": [
{
"street": "..."
...
},
{
...
}
]
},
{
...
}
]
```
Now, the loop simply loops over this list and the Create Company step only has to reference to `{{ company }}`, as the data has been prepared before the loop already.
The Dict Helper step will, depending on the data size, take a bit longer, however, this additional time is quickly gained by shaving off multiple seconds for each loop iteration.
In one similar production Flow, the Flow speed could be **increased 14 times**, which cut flow run time for an initial import from more than 25 hours to less than 2 hours.
### Changing large amounts of dictionaries from a list
In some cases, you might want to do some kind of data cleaning, where you e.g. change the values of a few columns, create the hash of entire rows, etc.
Instead of using the [Looper Helper](/connectors/helpers/loop-helper) and a [Dict Helper](/connectors/helpers/dict-helper), we recommend using either a Dict Helper and building a Jinja Loop in there or the [Spreadsheet Helper's Query Action](/connectors/helpers/spreadsheet-helper#query-spreadsheet), as both can handle large amounts of data in a more performant way than the Looper.
For the Dict Helper option, you can create a Jinja loop similar to this one with the "Define variables" action:
```django
[
{% for row in data %}
{
"field_1": "{{ row.field_1 | some_data_cleaning }}",
"field_2": "{{ row.field_2 | some_data_cleaning }}"
}
{% if not loop.last %},{% endif %}
{% endfor %}
]
```
For the Spreadsheet Helper option, you can make use of regular SQL.
# Jinja Template Language
## What is Jinja?
We use Jinja2 for rendering data across the app in combination with JsonPath - so both are core concepts to understand. Jinja2, short Jinja, is a template language, based on the programming language Python. It can be used within HTML code and as a simpler alternative to Python in tools such as Locoia.
One of the primary use cases of Jinja is to use it to define and refer to variables. In the first step, a variable is defined in a JSON dictionary:
```python
{
"name": "John",
"age": 35
}
```
In a text, you can now refer to those variables by using double curly bracket ( {{ … }} ), such as:
```python
Hello {{ name }}!
```
This will output: Hello John!
Logic, such as if-else logic, can also be used in Jinja:
```python
{% if age >= 30 %}
{{ name }} is 30 years or older.
{% else %}
{{ name }} is less than 30 years old.
{% endif %}
```
Based on the variables defined above, this would output: John is 30 years or older.
## How Jinja is used in Locoia
Jinja has three main purposes in Locoia
1. Referencing to previous steps and connectors in a flow
2. Using functions and filters to format and change data
3. Adding advanced logic to flow steps which cannot be easily done with existing flow helpers
### 1. Referencing to previous steps and connectors in a flow
Similar to the variables example stated above, Jinja can be used within Locoia to reference to previous steps in a flow. For example, the flow could consist of a Dict Helper and Freshsales Connector:
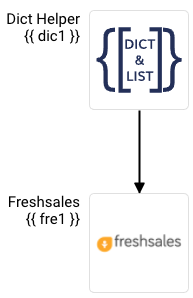
The Dict Helper (dic1), in this example, contains the following dictionary:
```python
{
"firstName": "john",
"lastName": "Doe",
"email": "john.doe@example.com"
}
```
In order to refer to those values in the Freshsales Connector, Jinja needs to be used. To do so, one needs to enter the entire path to the value which should be referred to. The path, in this example, consists of:
1. The reference to the connector (in this case dic1)
2. The key within the dictionary (e.g., firstName)
The elements of the path are separated by dots, and the entire path is wrapped in double curly brackets. By using that schema, the reference to the first name is:
```python
{{ dic1.firstName }}
```
The references to the fields are written into the Freshsales connector, such as:

When the flow is run, the Freshsales connector receives the following input data:
```python
{
"contact": {
"first_name": "john",
"last_name": "Doe",
"email": "john.doe@example.com"
}
}
```
You can find out more about referencing using Jinja [here](http://support.dynamicinsight.com/en/support/solutions/articles/48000346211).
### 2. Using functions and filters to format and change data
Functions and filters in Jinja are similar to Excel functions; they can, for example, [change date formats](/automation/flow-builder/smart-data-wrangling), [replace certain words and letters](https://jinja.palletsprojects.com/en/2.11.x/templates/#replace), or [capitalize words](https://jinja.palletsprojects.com/en/2.11.x/templates/#capitalize).
In the previous example, the first name is given in lower case ("john") by the dict helper; in order to send "John" to Freshales, i.e., capitalizing the first letter of a word, one can make use of the Jinja capitalize filter. Using a filter is as simple as using a pipe (|) after the variable which should be changed:
```python
{{ dic1.firstName | capitalize }}
```
When the flow is run, the Freshsales connector now receives the following input data:
```python
{
"contact": {
"first_name": "John",
"last_name": "Doe",
"email": "john.doe@example.com"
}
}
```
### 3. Adding advanced logic to flow steps which cannot be easily done with existing flow helpers
Sometimes one might want to use logic in a connector input to change the input depending on the inserted value.
For example, it could be checked if the email contains the @ symbol, and if that is the case, the email is inserted into the field; otherwise, a comment and the email is inserted into the email field. This can be done by using a Jinja if-else statement in combination with the [Jinja in test](https://jinja.palletsprojects.com/en/2.11.x/templates/#in):
```python
{% if '@' in dic1.email %}
{{ dic1.email }}
{% else %}
Check for the correct E-Mail! {{ dic1.email }}
{% endif %}
```
If the email would not contain an @ symbol, e.g., john.doeexample.com, the Freshsales connector would receive the following input data for the email field:
```python
Check for the correct E-Mail! john.doeexample.com
```
## Filtering a list by a list
Based on the list below (L1), you want to filter another list (L2) and only get the domains back from L1 which are starting with L2.
**L1:**
```json
[
"questions@airtable.com",
"legal@airtable.com",
"privacy@airtable.com",
"integrations@airtable.com"
]
```
**L2:**
```json
[ "questions@", "legal@" ]
```
**Solution:**
```django
{% set emails = L1 %}
{% set white_list = L2 %}
[
{% for email_beginning in white_list %}
{% for email in emails %}
{% if email_beginning in email %}
"{{ email }}",
{% endif %}
{% endfor %}
{% endfor %}
]
```
## Further Information
The official documentation, which includes most of the Jinja functions which you can use in Locoia as well as extensive explanations of the correct syntax, can be found [here](https://jinja.palletsprojects.com/en/2.11.x/templates/).
In order to test your Jinja code, you can use a third party [Jinja playground](https://tech-playground.com/jinja). Please note that you should not enter any confidential information (such as company or customer data) in such tools, as they might store your input data.
# Jinja: (Custom) variables, wildcards and functions
**Jinja2**, one of the world's most popular data rendering engines, is used as a templating language to render individual information. Many core functions are available. Some are not available for security reasons. A list of the core external functions can be found under:
* [Variables](https://jinja.palletsprojects.com/en/2.10.x/templates/#variables)
* [Filters](https://jinja.palletsprojects.com/en/2.10.x/templates/#filters)
* [Tests](https://jinja.palletsprojects.com/en/2.10.x/templates/#tests)
* [Comments](https://jinja.palletsprojects.com/en/2.10.x/templates/#comments)
* [Escaping](https://jinja.palletsprojects.com/en/2.10.x/templates/#escaping)
* [Line Statements](https://jinja.palletsprojects.com/en/2.10.x/templates/#line-statements)
* [Template Objects](https://jinja.palletsprojects.com/en/2.10.x/templates/#template-objects)
* [Working with Manual Escaping](https://jinja.palletsprojects.com/en/2.10.x/templates/#working-with-manual-escaping)
* [Working with Automatic Escaping](https://jinja.palletsprojects.com/en/2.10.x/templates/#working-with-automatic-escaping)
* [All about loops and accessing objects with loops](https://jinja.palletsprojects.com/en/2.10.x/templates/#list-of-control-structures)
* [For](https://jinja.palletsprojects.com/en/2.10.x/templates/#for)
* [If](https://jinja.palletsprojects.com/en/2.10.x/templates/#if)
* [Call](https://jinja.palletsprojects.com/en/2.10.x/templates/#call)
* [Filters](https://jinja.palletsprojects.com/en/2.10.x/templates/#id11)
* [Variable assignments](https://jinja.palletsprojects.com/en/2.10.x/templates/#assignments)
* [Math](https://jinja.palletsprojects.com/en/2.10.x/templates/#math)
* [Comparisons](https://jinja.palletsprojects.com/en/2.10.x/templates/#comparisons)
* [Logic](https://jinja.palletsprojects.com/en/2.10.x/templates/#logic)
* [Other Operators](https://jinja.palletsprojects.com/en/2.10.x/templates/#other-operators)
* [List of built-in Filters](https://jinja.palletsprojects.com/en/2.10.x/templates/#list-of-builtin-filters)
* [Expression Statement](https://jinja.palletsprojects.com/en/2.10.x/templates/#expression-statement)
* [Loop Controls](https://jinja.palletsprojects.com/en/2.10.x/templates/#loop-controls)
## Custom Locoia variables
Custom Locoia variables can be found in the Functions Reference Panel in the Flow Builder and via autocomplete:
### Additional details
For some functions there're additional details to consider.
#### regex\_replace
In order to capture groups with this function `\g` needs to be used with named groups and `\g` with plain groups.
## Noteworthy core Jinja functions
### selectattr
* [Official documentation](https://jinja.palletsprojects.com/en/3.0.x/templates/#jinja-filters.selectattr)
* Usage:
```django
{% for record in list_reference | selectattr(field_reference, 'match', 'comparison_value') %}
```
* Use case: This lets you filter any (nested) list directly in Jinja by specific attributes
### namespace()
* [Official documentation](https://jinja.palletsprojects.com/en/3.1.x/templates/#jinja-globals.namespace)
* Usage: \
The `namespace` object (container) is an easy way to create an object with attributes. It helps avoid conflicts with variable names and provides a clean and concise way to store and retrieve values within the context of a template.
This is particularly useful when carrying a value from within a loop body to outside the loop, which is not possible with standard variables.
* Example:\
This code snippet generates a list of records, separating them with commas. It utilizes a dedicated `comma_set` object to track whether a comma has been set for any record so that it can be placed correctly for a valid JSON. As this variable value needs to be carried across loop iterations, a namespace needs to be used.
```django
{% set comma_set = namespace(first_comma_set=False) %}
[
{% for record in records %}
{% if record ... %}
{% if comma_set.first_comma_set %},
{% else %}
{% set comma_set.first_comma_set = True %}
{% endif %}
{{ record }}
{% endif %}
{% endfor %}
]
```
### get()
* [Official documentation](https://docs.python.org/2/library/stdtypes.html#dict.get)
* Usage:
The `get()` function in Jinja (a standard Python dictionary method) allows you to efficiently map a dictionary using key-value pairs. It is particularly useful when dealing with scenarios where you need to map values based on specific keys.
* Example\
Imagine you have to map a dictionary with the following key-value pairs:
```python
{% set type_mapping =
{
'Wohnung': 'APARTMENT',
'Stellplatz außen': 'PARKING',
'Garagen': 'PARKING'
}
%}
```
Traditionally, you might use an if-else statement to perform the mapping:
```python
{% if unit_type in type_mapping %}
"{{ type_mapping[unit_type] }}"
{% else %}
"DEFAULT VALUE"
{% endif %}
```
However, to minimize code and enhance readability, you can achieve the same result using the `get()` function:
```python
{{ type_mapping.get(unit_type, "DEFAULT VALUE") }}
```
The `get()` function retrieves the value associated with the specified `unit_type` from the dictionary. If the `unit_type` is not found, it defaults to the specified `"DEFAULT VALUE"`. This approach simplifies the code and improves maintainability.
# Magic Code Samples
Jinja code examples for tricky things.
### Email parsing
How to get [`first.last@email.com`](mailto:first.last@email.com) the **first** and **last** name in two variables in Jinja?
```django
{% set first, last = email.split("@")[0].split(".") %}
{{ first }} {{ last }}
```
How to get the myname of [`myname@email.com`](mailto:myname@email.com) before the @ nicely, e.g. to use as a first name?
```
{% set first = email.split("@")[0] %}
{{ first }}
```
###
### Mapping to lists
If you have two **lists**, one of which can be **nested**, and you want to combine items of it, do as follows:
List 1 called `list_1`:
```json
{
"items": [
{
"taxCode": "23456",
"salesTaxRate": {
"taxRate": "0.0001"
}
}
]
}
```
List 2 called `list_2`:
```json
{
"id": "11",
"custcol_tax_code": "23456",
"amount": 1000.00,
...
}
```
In the [Dict Helper > Define variable](/connectors/helpers/dict-helper):
```django
...
{% for line_item in list_1["items"] %}
{% for item in list_2 %}
{% if line_item.taxCode == item.custcol_tax_code %}
"line_item_id": "{{ item.item.id }}"
"amount": "{{ item.amount }}"
"tax_rate": "{{ line_item.salesTaxRate.taxRate }}"
{% endif %}
{% endfor %}
{% endfor %}
...
```
{% hint style="danger" %}
Since **items** is reserved in Python, and we use Python in the backend, you need to call it like **`list_1["items"]`**`, rather than standard dot notation.` \
\
`list_1.items is NOT possible.`
{% endhint %}
# Connectors & APIs
{% content-ref url="/pages/-MczJLzcWuxvaMhmQZoq" %}
[Titles and References](/automation/flow-builder/connectors-and-apis/titles-and-referencing-refids-of-connectors-and-helpers)
{% endcontent-ref %}
{% content-ref url="/pages/-MczQcoMAlKwBM7vO26H" %}
[Response Headers & Status Codes](/automation/flow-builder/connectors-and-apis/response-headers-and-status-codes)
{% endcontent-ref %}
{% content-ref url="/pages/-MczPHzUPj0Ov17H56-r" %}
[Custom Data Fields](/automation/flow-builder/connectors-and-apis/custom-data-fields)
{% endcontent-ref %}
{% content-ref url="/pages/-MczQGC40\_MMasTMOdbH" %}
[Wildcard API calls and actions](/automation/flow-builder/connectors-and-apis/wildcard-api-calls-and-actions)
{% endcontent-ref %}
# Titles and References
Titles and JsonRefs for Connectors and Helpers
## How to change the titles of connectors and helpers?
To make each step of an automation flow easily understandable for everyone, titles are editable. You can click either on the title or the "Edit" button in the right sidebar (the connector panel). Access the connector panel by double-clicking any connector or helper you have dragged onto the workspace.
As in the screenshot above, click on the title or the button and you will be able to edit the title and reference, as you can see in the screenshot below.
Best practice: Ideally, you keep the name of the connector or helper in the title and just add the action the step is doing to the name including all details needed, e.g.:
* Pulling contact from CSV, SalesForce
* Looping over a list of products
* Sending email to each customer
* Boolean decision based on customer\_type
* Get NPS score from Zenloop for all new users of the last 7 days
* etc.
## Changing references of Connectors and Helpers, a.k.a. RefIDs
As explained above and shown in the previous screenshot, in addition to changing titles, you can change RefIDs. RefIDs are part of each helper and connector. They are the way to reference data pulled or created in various steps of a flow - allowing you to reference data that has been created in a previous step. The concept of RefIDs is explained in full detail here.
# Referencing data of objects, lists, arrays - how to pass data dynamically
Referencing data of dictionaries (dicts or objects), lists, arrays - how to pass data dynamically
Referencing data such as dictionaries (dicts), lists, arrays, or CSV column-style data is one of the more tricky tasks for business users who are not familiar with data objects in programming, but necessary to automate more complex flows and logic. It is pretty similar to complex spreadsheet functions. We try our best to make it as easy and intuitive as possible by providing you with a wealth of documentation as well as examples in the Flow Automation Marketplace.
We rely on one of the industry standards, [JSON-Path](https://github.com/kennknowles/python-jsonpath-rw), for all our referencing, as it is fairly intuitive and well-documented.
Below you can find a variety of referencing examples to get you started. For any questions, please reach out to support.
### Accessing list data in a nested dictionary
How to access data - below is the result of the connector with the ref hubs1:
```json
{
"deals": [
{
"portalId": 123213213,
"dealId": 345345345,
"isDeleted": false,
"associations": null,
"properties": ...
```
To access the dealId in the next step, you need to write the following in the respective field where you want the data to be: `{{ hubs1.deals.0.dealId }}`
**Explanation:**
* All data referencing is based on Jinja2, the Python templating language. It is similar to Liquid or other templating languages, with some nuances.
* The `{{ }}` is always used when data is referenced to from a previous step.
* The `hubs1` references the **previous flow run step** itself by its RefID
* The `deals` references the object in the above JSON
* Since within the **`"deals": [`** a list is nested, indicated by the `[` order, we need to specify that we want to access the first object of the list, while the first one is in any programming-related terms 0.
* Lastly, we concatenate with periods a period the `dealId`**.** Note that the letter `I` in `dealId` is capitalized (Camel case style) in this particular API from Hubspot. This is important, as APIs are case-sensitive.
When working with dictionaries in Python, `example.items` to access a key named `items` because `items()` is a built-in method of dictionaries. Instead, use the bracket notation like `example['items']`.
**Example:**
Given that the previous step returns a dictionary like this, and you want to reference items in it:
```json
{
"items": [
{
"id": 234,
"position": 10,
"roomCount": null,
"entranced": ...
```
To access the `items` list, use: `get_units['items']`
DO NOT use`get_units.items`, as this will result in an error.
# Accessing Objects with JSONPath
Accessing Objects and List Items with JSONPath in the Flow Builder Results
Locoia uses JSONPath for referencing data. Note that $ is not required anywhere within the app. Instead, we use Jinja2 so `$.store.book[*].author` becomes `{{ store.book[*].author }}` in Locoia.
Test your JSONPath with the [JSON Path Visualizer Tool](https://jsonpath.com/) (don't enter any private information).
### Code example
{% tabs %}
{% tab title="JSON Response Payload" %}
```javascript
{ "store": {
"book": [
{ "category": "reference",
"author": "Nigel Rees",
"title": "Sayings of the Century",
"price": 8.95
},
{ "category": "fiction",
"author": "Evelyn Waugh",
"title": "Sword of Honour",
"price": 12.99
},
{ "category": "fiction",
"author": "Herman Melville",
"title": "Moby Dick",
"isbn": "0-553-21311-3",
"price": 8.99
},
{ "category": "fiction",
"author": "J. R. R. Tolkien",
"title": "The Lord of the Rings",
"isbn": "0-395-19395-8",
"price": 22.99
}
],
"bicycle": {
"color": "red",
"price": 19.95
}
}
}
```
{% endtab %}
{% endtabs %}
### Reference examples and descriptions
| JSONPath | Description |
| ------------------------------------------------ | ----------------------------------------------------------- |
| $.store.book\[\*].author | The authors of all books in the store |
| $..author | All authors |
| $.store.\* | All things in store, which are some books and a red bicycle |
| $.store..price | The price of everything in the store |
| $..book\[2] | The third book |
| $..book\[(@.length-1)] | The last book via script subscript |
| $..book\[-1:] | The last book via slice |
| $..book\[0,1] | The first two books via subscript union |
| $..book\[:2] | The first two books via subscript array slice |
| $..book\[?(@.isbn)] | Filter all books with isbn number |
| $..book\[?(@.price<10)] | Filter all books cheaper than 10 |
| $..book\[?(@.price==8.95)] | Filter all books that cost 8.95 |
| $..book\[?(@.price<30 && @.category=="fiction")] | Filter all fiction books cheaper than 30 |
| $..\* | All members of JSON structure |
# Merging nested JSON objects
If you have multiple nested JSON Objects (with no duplicate attribute names) like in this example object named `Statement`:
```json
{
"Amount": {
"Currency": "EUR",
"Value": "10.99"
},
"Valuation_Date": {
"Date": "2022-01-24"
},
"References": {
"FullRef": "CTC123456879",
"ClearRef": "123456789"
}
}
```
You can merge them into a flat one using the following code snipped:
```django
{
{% for object in [Statement.Amount, Statement.Valuation_Date, Statement.References] %}
{% for key, value in object.items() %}
"{{ key }}": "{{ value }}",
{% endfor %}
{% endfor %}
}
```
To receive:
```django
{
"Currency": "EUR",
"Value": "10.99"
"Date": "2022-01-24
"FullRef": "CTC123456879",
"ClearRef": "123456789"
}
```
# Parsing JSONs from String
Some connectors and databases return JSON data in an escaped string that you can not use right away. Here an example:
```json
{
"timestamp": 1657722582,
"information" : "{\"id\":\"0001\",\"type\":\"donut\",\"name\":\"Cake\",\"ppu\":0.55,\"active\":false}"
}
```
If you receive JSON data as a string that you like to convert into a JSON, you can use our dictionary helper.
If we assume that the data is stored in `get_data` the following code example will help you to parse the data in a way that it can be read as a JSON:
```django
{{ get_data.information | replace('null', 'None') | replace('true', 'True') | replace('false', 'False') | replace('\\/', '/') }}
```
The result will be:
```json
{
"id": "0001",
"type": "donut",
"name": "Cake",
"ppu": 0.55,
"active": false
}
```
# Response Headers & Status Codes
How can I access response headers and status codes from Connectors, APIs and REST Helper
You can access response headers from any [Connector](/connectors/connectors) and the [REST Helper](/connectors/helpers/rest-helper) by simply using Jinja filter function `http_header`:
```python
{{ zendesk | http_header('status-code') }}
```
To access the status code, you can either access it from the headers (as shown above) or, for example, if the API does not return the status code in the headers, access it with the Jinja filter function `http_status_code`:
```python
{{ zendesk | http_status_code }}
```
# Custom Data Fields
How to use custom data fields you generated in your Apps and APIs?
## How to use custom data fields you generated in your Apps and APIs?
### Step 1: On the right hand side-panel, click on the + button next to apply changes to create and add custom fields to any integration or helper

### Step 2: - A grey layover pops up and you can enter your custom field-name and select your desired input type
**Note**: Do **not** enter the same field names as the API uses as standard field names. E.g. If Zendesk uses \`external\_id\` as a standard field name. You should not enter \`external\_id\` again as a custom field name, unless we have not provided the field name yet for any reason. This should generally not be the case, as most SaaS systems ensure themselves that field names are not the same, but better to be on the save side.

# Wildcard API calls and actions
As of mid-October 2020, we started to include wildcard actions on each new Connector in order to give our customer full flexibility in creating end-points, that Locoia may not provide yet. The HTTP requests that are covered are:
* POST
* GET
* PUT
* PATCH
* DELETE
Just search for \`**wildcard**\` in the connector actions. If you don't find a wildcard action yet on a connector, we can add them in under 24 hours (business time) on any of the connectors.
{% hint style="info" %}
The **Endpoint** can be *relative* to the Connector base domain or you can pass an *absolute* URL in order to e.g. switch from api.myDomain.com/something to file.myDomain.com/upload
{% endhint %}

The individual fields offered on each wildcard action [render Jinja2 dynamically](/automation/flow-builder/jinja2-template-language).
# Response cleaning
Function characters are automatically removed to ensure valid JSON responses
Some APIs return data, in a format that is incorrect JSON, as it contains [function character](https://www.barcodefaq.com/ascii-chart-char-set/#:~:text=The%20characters%20from%20ASCII%200%20to%2031%20are%20commonly%20referred%20to%20as%20function%20characters%20because%20they%20perform%20functions%20instead%20of%20a%20printed%20characters.%20Normally%2C%20these%20characters%20are%20not%20visible%20unless%20an%20application%20is%20used%20such%20as%20IDAutomation%E2%80%99s%20Barcode%20Scanner%20ASCII%20String%20Decoder), and thus can't be parsed as JSON.
In order to be able to parse these responses to JSON, all function characters (except for the characters for 9 `(\t,` tab), 10 (`\n`, newline), and 13 (`\r`, carriage return)) are automatically removed from responses.
# Text Strings, Date & Time, Numbers and Currencies
{% content-ref url="/pages/-MczOH0tYscGuCqQz\_U7" %}
[Text and Strings](/automation/flow-builder/smart-data-wrangling/text-and-string-manipulation)
{% endcontent-ref %}
{% content-ref url="/pages/-MczIJQQXkj5inerAUq1" %}
[Dates & Time](/automation/flow-builder/smart-data-wrangling/dates-time-and-datetime)
{% endcontent-ref %}
{% content-ref url="/pages/-MczQzkuDLhrkYcrRTqX" %}
[Numbers (Thousand Separators, Currencies)](/automation/flow-builder/smart-data-wrangling/number-formatting-thousand-separators-currencies)
{% endcontent-ref %}
# Text and Strings
Text manipulation and adjustments - How to work with text?
The easiest way to test your Jinja2 expressions is by using a[ Jinja2 evaluator](https://www.google.com/search?q=jinja2+live+parser) with mock data (Don't include any sensitive data in those). Note, only standard Jinja2 expressions will work here, like if, elif, upper, etc.
#### Making strings UPPER case
```python
{% set my_text = 'This will be upper case!' %}
{{ my_text | upper }}
```
Returns: THIS WILL BE UPPER CASE!
#### Making strings lower case
```python
{% set my_text = 'This will be upper case!' %}
{{ my_text | lower }}
```
Returns: this will be lower case!
#### Concatenating Strings
```python
{{ '+49', '292828834' | join(' ') }}
--> Returns a space: +49 292828834
If you just want a joint without a string, you can just write:
{{ '+49', '292828834' | join }}
--> Returns a space: +49292828834
```
Another common use-case is comma-separated concatenation:
```python
{{ 'BMW', 'Mercedes', 'Audi' | join(', ') }}
--> Returns: BMW, Mercedes, Audi
```
Limiting or shortening strings to a certain number of characters:
```python
my_string = "Hello my nam is Max"
my_string[:5]
--> Returns: Hello
my_string[:7]
--> Returns: Hello m
FYI: my_string[:7] yields the same result as my_string[0:7]
```
To read up on string manipulation in all detail, check out: [realpython.com - String manipulation.](https://realpython.com/python-strings/)
# Dates & Time
Smart Data modification - Date, Time and Datetime and how to tweak it your way
Locoia offers a wide array of pre-built date wildcards that are ready to be used as well as advanced filters that allow you to tailor dates according to your needs - meaning, modify, adjust and change them. Generally, you can pretty much wrangle (play) with date, time and datetimes in any way you may need.
## Date **wildcards** ready to be used
The below date wildcards work immediately for your usage in any input field of a flow. NOTE: You cannot have a period at the end of the sentence.
All ready to use wildcards and example dates based on assuming today's date is 2019-06-01 09:09:01 :
* Current date:
* `{{ datetime }}` → 2019-06-01 09:09:01 (UTC datetime stamp)
* `{{ date }}` → 2019-06-01
* `{{ date_de }}` → 01.06.2019
* `{{ date_us }}` → 06/01/2019
* Current date - 7 days; so the date of seven days ago
* `{{ date_de_7 }}` → 24.05.2019
* `{{ date_utc_7 }}` → 2019-05-24
* `{{ date_us_7 }}` → 05/24/2019
* Current date - 30 days; so the date of thrifty days ago
* `{{ date_de_30 }}` → 01.05.2019
* `{{ date_utc_30 }}` → 2019-05-01
* `{{ date_us_30 }}` → 05/01/2019
* Current date - 180 days; so the date of 180 days ago
* `{{ date_de_180 }}` → 03.12.18
* `{{ date_utc_180 }}` → 2018-12-03
* `{{ date_us_180 }}` → 12/03/2018
* Current datetime in UTC:
* `{{ time }}` → 09:09
* Current UNIX time in seconds in UTC:
* `{{ unix_timestamp }}` → 1622073600
## Date time examples
Today 7 days ago in unix time with sends, e.g. need for HubSpot:
`{{ unix_timestamp *1000 - 60 * 60 * 24 * 7 * 1000 }}`
## Advanced date, time and datetime handling
To provide even more flexibility than wildcards, you can use the convert\_datetime function. It essentially allows you to output any kind of date or time format as you wish.
As above your code needs to go in between two `{{ }}` curly brackets and we borrow the logic from [Jinja2 filters](http://jinja.pocoo.org/docs/2.10/templates/#filters).
The logic foes as follows: Enter your date in any commonly known format you wish, e.g. UTC, German format, US format in single brackets ' within the curly brackets. Then enter a so called pipe on Mac OS (alt option + 7) on a PC (ctrl + alt + <) oder auf deutsch (strg + alt + <). Then include the word convert\_datetime() and within it the date format as you desire in single quotes ' . E.g. below you see %Y--%m--%d where each letter immediately followed by the % sign, indicates which of your provide date's information you want to pass:
* `%Y` is the year
* `%m` is the month
* `%d` is the day
The double dashes -- are included for the user to be displayed:
```python
{{ '12/17/2019' | convert_datetime('%Y-%m-%d') }}
```
**The above expression results in 2019--12--17 as a result.** This logic may look a little bit tricky at first, but it gives you full flexibility to use the below variables to output dates and times as you wish.
If you use a date wildcard as the basis, e.g. if you want to pull all data for the last 3 month from an API and the API takes a start and end date, this would look like this for the start date to get the date start date from 90 days ago:
```python
{{ 'datetime' | convert_datetime('%Y-%m-%d', -90) }}
```
...and this to get today's date for the end date:
```python
{{ 'datetime' | convert_datetime( '%Y-%m-%d' ) }}
```
If the date is dynamically coming e.g. from a loop, this would look like this, where loop1\[0] is the row of e.g. a CSV to be changed:
```python
{{ loop1[0] | convert_datetime('%Y-%m-%d %H:%M') }}
```
In order to ingest various types of dates e.g. when the **day** or **year** is in the first place. Just use the `'dayfirst'` or `'yearfirst'` in the corresponding positions
```python
convert_datetime('%Y-%m-%d', -180, True, False) }}
```
```
convert_datetime('%Y-%m-%d', -180, yearfirst=true) }}
```
Positions:
1. Format you wish to convert the date to
2. Number of days you which to move the date to, relative to e.g. today if you pass in `date` or `datetime` as a wildcard. -180 is today's date half a year ago. +180 would today's date in half a year from now.
3. First Boolean (`True`) - determines if the day is shown first depending on the Boolean value. Example: for 12/11/2019 the date is interpreted as 11th of December 2019
4. Second Boolean`(`False`)` - determines if the year is shown first depending on the Boolean value. This means that for 12/11/17 the date is interpreted as 17th of November 2012 (and the interpretation here is clear since the 17th cannot be a month. If the number in the last place in this example is below 13, you also may want to pass in dayfirst or not, depending on the interpretation of the passed in date you desired.
Variables to be used in the convert\_datetime functions first argument (first position where you format the date string you desire):
* `%a`: Returns the first three characters of the weekday, e.g. Wed.
* `%A`: Returns the full name of the weekday, e.g. Wednesday.
* `%B`: Returns the full name of the month, e.g. September.
* `%w`: Returns the weekday as a number, from 0 to 6, with Sunday being 0.
* `%m`: Returns the month as a number, from 01 to 12.
* `%d`: Returns the day as a number, from 01 to 31.
* `%H`: Returns the hours of the day 1-24
* `%M`: Returns the minutes of the hour 1-60
* `%S`: Returns the seconds of the minute 1-60
* `%f`: Returns the milliseconds
* `%p`: Returns AM/PM for time.
* `%Y`: Returns the year in four-digit format, e.g. 2021
* `%y`: Returns the year in two-digit format, that is, without the century. For example, "21" instead of "2021".
* `%f`: Returns microsecond from 000000 to 999999.
* `%Z`: Returns the timezone.
* `%z`: Returns UTC offset.
* `%j`: Returns the number of the day in the year, from 001 to 366.
* `%W`: Returns the week number of the year, from 00 to 53, with Monday being counted as the first day of the week.
* `%U`: Returns the week number of the year, from 00 to 53, with Sunday counted as the first day of each week.
## Special Cases
1\. If you get a date and always want the first of the month of the respective date, you can do this like this:
```python
{{ '2019-09-03' | convert_datetime('1.%m.%Y') }}
```
This will give you the first of the month in German time format.
2\. If your DateTime string includes a timezone adjustment at the end (e.g. `"+01:00"`), this part of the string will unfortunately not be read by the `| convert_datetime` function (as it's not a normal ISO string). Instead, it is possible to convert your DateTime to a UNIX timestamp, calculate the necessary adjustment in seconds, and then convert back to a normal DateTime string of your choosing. For a full example, search for "Timezone" on the [Flow Marketplace](https://app.dynamicinsight.com/#/flow-marketplace) to find a "Handling Datetime Strings with appended Timezone adjustment" Flow.
# Numbers (Thousand Separators, Currencies)
Juggling different number formats can be intimidating - but thanks to the power of Jinja, nothing is impossible:
If you are using a Flow to, for example, dynamically generate invoices (see our [Hubspot, Clockify & Google Docs Flow](https://app.dynamicinsight.com/#/flow-marketplace) on the marketplace), then you might have run into the issues of properly formatting your numbers. Well, fear no more, for the solution is nigh. Just keep on reading.
## String Formatting in Python
String formatting in python is extremely powerful and advanced. In fact, it is so complex, it has its own [mini-language](https://docs.python.org/3/library/string.html#format-specification-mini-language).
If something feels unclear at any point in this article, or you want to dive even deeper into the topic, you can find the entire documentation for strings in Python [here](https://docs.python.org/3/library/string.html). Good luck.
But, because I like you, I will do my best to save you the detour. So let's get into the juicy details.
### The three different Methods of String Formatting
There are three different ways of formatting strings in python - the old one, the new one, and the newest one!
The old-style formatting uses % placeholders for formatting text:
```python
"John Wayne has %d living parents." % 0
```
Will yield the string "John Wayne has 0 living parents" (poor guy).
The new-style formatting uses {}-brackets for formatting:
```python
"However, John Wayne has {0} friendly Butler, {1}.".format( 1, "Alfred")
```
This yields the string "However, John Wayne has 1 friendly Butler, Alfred."
The newest style of formatting with string literals, called f-strings, uses curly brackets as well, but there's no need to use `.format` function anymore:
```python
character = "Bateman"
strength = 1000
f"{character}: I can do {strength} now."
```
Yields us "Bateman: I can do 1000 now."
As you can see, we can use curly brackets in combination with indices to specify which argument of the .format function should go where in the string. This is especially convenient when inserting a large number of arguments into a string as you won't have to count the previous occurrences of %-signs to know where your argument will end up.
In our Flow Builder, either way will work fine, however, %-replacement can be used with | format , while the {} notation will only work with the Python built-in .format function, so keep that in mind. However, as you will soon see, using the {} notation is more powerful.
### Using Python String Formatting for pretty Numbers
If we want to print a float number as a currency somewhere, we will want to make sure that we always print the number with two decimal precision. As you might have already encountered, simply trying to print a float will lead to the shortest float possible, e.g. "18.5", when we really want it to print "18.50".
But here comes the magic: using string formatting, we can tell the tool to always print two decimals!
```python
"%.2f" | format(ourfloat)# or"{:.2f}".format(ourfloat)
```
will both yield us a number with two decimals precision printed, no matter if the decimals are zero. Note the inclusion of a colon in our new-style formatting, which basically replaces the percentage sign when you want to use the Format Specification Mini-Language.
What am I looking at?
As specified in the [relevant Python documentation](https://docs.python.org/3/library/string.html#format-specification-mini-language), the number after the dot (in this case 2) specifies the precision. Want more decimals? Simply increase the number!
The last character inside the brackets specifies the notation of the number to be pasted in (f for fixed point, e for scientific notation, % for percent, just to name a few.
If we want to include thousand separators in our number, we can extend the code, but it will only work using new-style formatting:
```python
"{:,.2f}".format(1500.9)
```
This code will yield "1,500.90", which is finally what we want to represent currencies. We can even immediately format our string to include a currency sign, e.g.:
```python
"${:,.2f}".format(1500.9)
```
As only the content of the brackets is replaced, this will yield "$1,500.90".
### Printing German Number Notation
Ah yes, the Germans need to use a different way to represent numbers, of course. Maybe your country does too, and you want to switch the thousand separators and the decimal point. We have to get a bit hacky here, but don't worry! It's easy once you see it.
```python
{{ "{:,.2f}".format(price) | replace(",", "X") | replace(".", ",") | replace("X", '"") }}
```
Woah woah woah, what's going on here?
Well, we are just chaining three different replace functions to get executed once the formatting function is done. So what exactly are we doing here?
1. The format function gets called and returns our number with American formatting. Current string: 1,500.90, Germans unhappy
2. If we were to immediately switch the commas for dots, we would be unable to replace the dots with commas, as we would have commas everywhere. So instead we need to use a placeholder (X). Current string: 1X500.90
3. Now we can switch the dot with a comma. Current string: 1X500,90
4. Finally, we can replace the X(s) with our dot(s). Final Status: 1.500,90, Germans happy.
That's it! Correctly formatted numbers everywhere, yay!
Once again, if you want to dive deeper into the countless possibilities of string formatting in Python, check out the official documentation for the Python String Library [here](https://docs.python.org/3/library/string.html).
Happy automating!
# Email-formatting
This is how you best format email addresses
Usually you can find email addresses as attribute of a lot of entities, e.g. "user", "owner", or "contact" in various third party systems. This depends on the system, but the output often looks something like this:
```
{
"first_name": "Oliver",
"last_name": "Doe",
"email": "oliver.doe@gmail.com",
...
}
```
However, sometimes the email might be a free-form text field in the third party system, so some customers add a comment or even just use non-valid emails. Here are two examples:
1. `"email": "oliver.doe@gmail.com (brother)"`
2. `"email": "oliver.doe@go"`
In theses cases we have to make sure that the email is either fixable or recognized as a non-valid email. One can use the following Jinja code to do so:
```
"email": {% if owner.email != None %}{% set mail_list = regex_search(owner.email, "([A-Za-z0-9]+[.-_])*[A-Za-z0-9]+@[A-Za-z0-9-]+(\.[A-Z|a-z]{2,})+" ) %}{% if probe(mail_list, 0) %}"{{ mail_list.0 }}"{% else %}""{% endif %}{% else %}""{% endif %}
```
This returns the email in a correct format, or if it's not possible, an empty String "". For our examples that would mean:
1. `"email": "oliver.doe@gmail.com"`
2. `"email": ""`
# Code Fields
Searching and replacing in code fields
In all **Code fields**, you can use the below shortcuts (PC / MAC):
* Ctrl-F / Cmd-F --> **Start searching**
* Ctrl-G / Cmd-G --> Find **next**
* Shift-Ctrl-G / Shift-Cmd-G --> Find **previous**
* Shift-Ctrl-F / Cmd-Option-F --> **Replace**
* Shift-Ctrl-R / Shift-Cmd-Option-F --> **Replace all**
* Alt-F --> Persistent search (dialog doesn't auto-close, enter to find next, Shift-Enter to find previous)
* Alt-G --> Jump to line
There are many code fields across Locoia. Shortcuts can be used in all of them. Below is an example of the [SQL Helper](/connectors/helpers/sql-helper).
Code field of the SQL Helper
# Running single Flow steps
Run individual Flow steps for testing & debugging.
With the **Run flow step** button which is shown below the step's name you can run the current step without running the entire flow:

The flow step will then be executed and the debugger output will be shown directly in the flow builder:

The example above also uses references to other parts of the flow (`{{ start_date }}` and `{{ end_date }}`):

In order to run the **Summary Report** step, both referenced steps have to be run at some point before, e.g. as part of a regular flow run or through **Run flow step**.
{% hint style="warning" %}
The referenced steps need to be available as per [flow run data retention](/automation/flow-builder/flow-run-data-retention-and-logging) setting of the flow.\
E.g. if the flow ran for the last time 5 days ago and the flow run data retention setting on the flow is 2 days, **Run flow step** would not work, as the output for the referenced steps are not available.
{% endhint %}
The flow is always saved before running a flow step, thus the flow needs to be in a state where it can be saved (i.e. all connectors need to be connected, only one starting point, etc.).
## Special Cases
### Looper
When using **Run flow step** on a Looper, all steps within the looper will be run.\
The output shown will be the output of the Looper itself (i.e. a list of the Looper's results).
When running a flow step inside an action loop, the reference to the looper will not be the Looper's input (as it is the case in a regular flow run), but rather the Looper's output. Thus, testing those steps will not result in the same outcome as a regular flow run. \
Instead we recommend to run the Looper that the step is referencing.
When the `index` variable is used in a step that is being run, `index` it will be replaced by `0`.
### Mail Sender
This functionality is currently not available for the [Mail Sender](/connectors/helpers/mail-helper) and will return an error instead.
# Flow run data retention, logging, and error notifications
Flow data retention time (days) for data security and frugality
All automation flows can be configured with regards to how long data is saved for debugging: **The range is from 0 to 90 days**. 0 means the **data is not saved at all** and should only be used for properly tested automation flows as there is no way to follow what happened. Any number between 0 and 90 determines the number of days until which all debugging data of a flow run is deleted.
Screenshot from the flow settings upon clicking *edit* on a flow in the flow builder.

There is a default setting on the company which is the **default for all flows unless the flow data deletion time is set on an individual flow basis**. Once the flow data retention is set on the flow, it overwrites the setting of the account (company)-level.
## Logging all steps
By default only the **first three iteration** of a loop will be logged and be visible in the flow debugger.
You can log every loop iteration by turning the setting on in the flow-settings upon clicking *edit* on a flow in the flow builder:

{% hint style="info" %}
This will only apply to all future flow runs.
{% endhint %}
## Error notifications
You can set up notifications in case of errors on a per-flow basis by going to the flow settings and entering your email address into the respective field:

{% hint style="info" %}
You will only receive notifications when the flow's status is set to **live**
{% endhint %}
# Advanced View
When is the advanced view helpful for me?
The "Advanced View" appears when editing Connectors and Helpers in the Flow Builder.

The standard view is the most user friendly interface when building Flows. If you want to increase flexibility you should turn on "Advanced View". This might be the case if you want to add advanced logic to flow steps and use dynamic fields.

# Dynamic Title
Adding dynamic data to step titles
Sometimes it quite difficult to find specific steps in the Flow Debugger because e.g. the ID one is searching for is not part of the step’s title or endpoint and thus the step can't easily be found.
With the **Dynamic Title Postfix** field you can now add dynamic data to step titles, which will be fully searchable in the Flow Debugger:
Edit dialog will be visible when clicking on Edit in the action sidebar
There you could for example add the external id of a record you are updating or even add the main record id of a current loop iterations to all steps of the Loop.
# Custom Error Handling
Custom error handling within a Flow for each step (or node a.k.a. Connector or Helper) of a Flow
## Overview
With custom error handling [⚠️](https://emojipedia.org/warning/) you can set **how an error should be handled on a per-connector basis** in order to prevent flows from being terminated for small errors, but also handling crucial errors accordingly.
You can **set error handling on each connector** of a flow by opening it and clicking the edit button next to its name, where you find a dropdown with the available options:
## Error handling options
There are five options how to handle errors on each Connector and Helper node of a flow:
### 1. Terminate flow
Terminating the **entire flow** upon an error is the default option, the connector which caused the error will get the status `error`, just as the flow itself.
### 2. Continue flow
The flow continues with the **next flow step** as if there wasn't an error. The flow step with the error gets the status `error`, the flow itself has the status `success`. This is helpful if you e.g. loop over hundreds of records and don't want to stop the whole flow due to one error.
{% hint style="warning" %}
**Continue flow** cannot be used in the last step of a loop. In this case, use **Skip loop iteration** in the last step of the loop instead.
{% endhint %}
{% hint style="warning" %}
**Continue flow** should not be used in the [Boolean](/connectors/helpers/boolean-helper) and [Multi Case Helper](/connectors/helpers/multi-case-helper), as an error will not produce one of the outputs written on the arrows and thus the flow will get stuck at that particular point.
{% endhint %}
### 3. Skip loop iteration
The current loop **iteration is skipped** and the next iteration of that loop is started (i.e. the next 'item' of the list the looper is looping over).\
There is **no output saved** for the loop iteration with the error in the loop itself in order to use the content of the loop in further steps, as if the error didn't happen.\
The steps that happened inside the loop are shown in the flow debugger and the flow step with the error gets the status `error`.\
In case the looper is a while loop, which has input from the flow step that failed for the while condition, the looper would fail as well, which is then handled as specified in the looper.
### 4. Break current loop
The (current) loop where the flow step failed is broken, which means that the inner-most loop (based on the position of the error) is terminated and the flow continues as it would if the loop was finished. In the next flow iteration of the loop around it, the loop will be executed again as usual. This could either be the next step after the loop, or if the loop is nested, the loop around the loop where the flow step failed.
The failed flow step and the current loop get the status `error`.
### **5. Manual** handling
When you select **Manual handling**, another [arrow](/connectors/helpers/error-arrow) with the label **Error** is added to the corresponding connector.
Error handling arrow - nice word play!
In case of an error in that connector, the path with the error label will be executed (this could e.g. be reconnected to the standard flow).
# Error Handling Flows
A custom Flow to handle all errors or log errors and send error logs to a destination of your choosing, e.g. DataDog, Slack, etc.
This is the best way to log or send errors of all Flows to a destination of your choosing, e.g. DataDog or Splunk.
Error Handling Flows **are triggered each time an error occurs** in any Flow that contains the Error Handling Flow. It can use variables to reference to the error and the Flow itself. Thus error logging is defined once and then applied for all the Flows you chose.
An error handling Flow **can be any Flow** that handles dynamic data from an error. It could for example send the data to a monitoring service such as [Datadog](https://www.locoia.com/connector/datadog-integration), so that you have all your errors accessible there.
In order to trigger it each time an error occurs, **the Flow needs to be added in the Error Handling Flow** field of the Flow which should trigger it - accessible via the EDIT button on the Flow builder:
{% hint style="info" %}
Error Handling Flows will be triggered each time a **Flow Step** (individual node) has the status `error`(expect for steps with [this setting](#step-specific-trigger-setting)), even if the **Flow Run** status is `success`.\
[Error notifications](/automation/flow-builder/flow-run-data-retention-and-logging#error-notifications) on the other hand will only be sent when the **Flow Run** status for the whole run is `error` as well.
{% endhint %}
## Step specific trigger setting
Depending on the Flow and Error Handling Flow logic it might not make sense to trigger the Error Handling Flow for every Flow Step that might have an error.
For these Steps, triggering the Error Handling Flow can be turned off (default is on):
{% hint style="info" %}
This setting is only displayed if an Error Handling Flow is selected for the Flow.
{% endhint %}
## Available variables in the Error Handling Flow
You can use any of the following variables in the error handling Flow in order to access all details related to the error.
* `error_flow_id` - ID of the Flow having the error
* `error_flow_url` - URL of the Flow in the UI
* `error_flow_name` - Name of the Flow
* `error_debugging_url` - URL of the Flow debugging screen in the UI
* `error_flow_run_id` - ID of the Flow Run
* `error_step_name` - Name of the Flow Run Step
* `error_step_id` - ID of the Flow Run Step
* `error_step_input` - Input of the Flow Run Step (as shown in Flow Debugger)
* `error_step_output` - Output of the Flow Run Step (as shown in Flow Debugger); this is basically the error message
* `error_step_request_url` - The request URL, as shown in the Flow Debugger
* `error_step_response_code` - The response code, as shown in the Flow Debugger
* `error_error_date` - Time-stamp of the error (end date of step, as shown in the Flow Debugger)
* `error_connector_name` - Name of the connector where the error happened
* `error_connector_id` - ID of the connector where the error happened
```python
{
"error_flow_id": "{{ error_flow_id }}",
"error_flow_url": "{{ error_flow_url }}",
"error_flow_name": "{{ error_flow_name }}",
"error_debugging_url": "{{ error_debugging_url }}",
"error_flow_run_id": "{{ error_flow_run_id }}",
"error_step_name": "{{ error_step_name }}",
"error_step_id": "{{ error_step_id }}",
"error_step_input": "{{ error_step_input }}",
"error_step_output": "{{ error_step_output }}",
"error_step_request_url": "{{ error_step_request_url }}",
"error_step_response_code": "{{ error_step_response_code }}",
"error_error_date": "{{ error_error_date }}",
"error_connector_name": "{{ error_connector_name }}",
"error_connector_id": "{{ error_connector_id }}"
}
```
Additionally, you can make the outputs of the Flow steps available in the Error Handling Flow.
If a Flow has an Error Handling Flow each step of the Flow has a setting **Accessible in Error Handling Flow** (OFF by default).
When the setting is ON the **output of the Step** will be available in the Error Handling Flow.
{% hint style="info" %}
If the toggle is ON for the Looper Helper only the output of the whole Looper will be available in the Error Handling Flow (not the outputs of the single Looper Steps).
{% endhint %}
# Automatic Pagination
Making complex pagination as easy as a click of a button
## Overview
Pagination is used by APIs to divide a large amount of data into smaller chunks that are more manageable to retrieve and transfer.
### Manual pagination
If you implement pagination manually in a flow, you have to use
* a Looper,
* a special loop condition,
* sometimes a Dict Helper references the actual list of entities in the response, and
* a Dict Helper to flatten the loop's output
in order to get the results from all pages from a Connector.
Manual way of getting results from all pages
### Automatic pagination
With Automatic Pagination the process is much simpler: Just toggle the **Retrieve all data** switch button on supported actions:
Retrieve all data option
This will automatically do the entire pagination logic and will output a nice 'flat' list of records, ready to be further used inside the flow, thus replacing the manual 4-step process with a button click.
{% hint style="info" %}
The maximum number of pages is currently limited to 100 pages.
Please contact us in case you're running into this limitation.
{% endhint %}
# Flow Debugger
The Flow Debugger provides details over all previous and current Flow Runs and their logs.
## Sections
{% content-ref url="/pages/XHQiqcyD8SsQlvyPDMb2" %}
[Automatic Retrying](/automation/flow-debugger/automatic-retrying)
{% endcontent-ref %}
{% content-ref url="/pages/psejpeQsQgRvLWjILJRt" %}
[Run Flows again](/automation/flow-debugger/run-flows-again)
{% endcontent-ref %}
# Automatic Retrying
Automatic retrying of failed flows due to third party timeouts, downtimes, or rate limits
## Introduction
Locoia has an **automatic retry logic for failed flows** to handle third party timeouts, downtimes, rate limits, etc.. This makes it very convenient that if something goes wrong along the way your data and any temporarily generated data is stored and can be reused in order to continue exactly where the Flow Run was unintentionally stopped.
Automatic retrying is turned on by default, but can be turned off on a per Flow basis in the Flow's settings.

## Possible reasons for failure
* Flow is setup or built incorrectly
* Flow is built to process data in a certain way, but there may be data inconsistencies from time to time, as usual in data handling.
* Systems or APIs that flows interact with may be down or temporarily out of service.
* Systems or APIs may have rate limits allowing only a certain number of API calls per time unit, e.g. 100 per minute is often used.
## How flow failure is handled - smart retries
There are three different groups of errors, which have different retry logics:
| Groups | Retryable, with a long delay | Retryable, with a short delay | Non-retryable |
| ------------------------------------------------------------------------------------------------------------------------------------------- | ---------------------------------------------------------------------------------------------------------------------------------------------------------------------------------------------------------------------------------------------------------- | --------------------------------------------------------------------------------------------------------------------------------------------------------------------------------------------------- | ----------------------------------------------------------------------------------------------------------------------------------------------------------------------------------------------- |
| **Applies to all** [**Connectors**](/connectors/connectors) **and the following Helpers** | [Rest Helper](/connectors/helpers/rest-helper) |
Applicable errors (Checks from left to right, if any of the cases are applicable \['OR' check])
|
HTTP status codes 429, 503
Retry-After or X-RateLimit-Reset header is specified (except for 2xx status codes)
|
HTTP status is 5xx (except for 503)
DNS resolution failed
Network connection was abruptly closed
Generic network error happened
|
HTTP status is 4xx (except for 429)
User input contains Jinja syntax errors
+ All errors that didn’t fall into the first two groups
|
| **Retrying behavior** |
Retry once based on the Retry-After or X-RateLimit-Reset header or, if not set, after 3 minutes. If the Retry-After header specifies a value higher than 10 minutes, retrying will not take place at all.
| Retry after 1 second, regardless of Flow status and [custom error handling](/automation/flow-builder/custom-error-handling) settings. | No retrying |
| **Visibility in Flow Debugger while retrying** | Flow Run and Flow Run Step have status `retrying` | Flow Run and Flow Run Step have status `running` | N/A |
For all retry groups an [error email](/automation/flow-builder/flow-run-data-retention-and-logging#error-notifications) will be sent once the Flow Run's status changed to `error` (i.e. once retrying has taken place).
[Error Handling Flows](/automation/flow-builder/error-handling-flows) will be triggered for each error Flow Run Step, even if it is being retried successfully.
{% hint style="warning" %}
When the [Flow's data retention](/automation/flow-builder/flow-run-data-retention-and-logging) is set to 0 and an error occurs in one of the steps that falls into the first group, this step's contents will be temporarily stored and displayed in the Flow Debugger in order to make retrying possible.
In case you don't want this to happen, automatic retrying has to be disabled for the Flow
{% endhint %}
# Run Flows again
With "Run again" you can re-run a flow with the same webhook input as the original Flow Run
In the Flow Debugger you can directly re-run previous Flow Runs without having to go back to the Flow Builder itself or sending another [Webhook to trigger the Flow](/connectors/helpers/webhook-helper) by using the **Run again** button which appears above the steps of a Flow Run.
When re-running a Flow Run which doesn't use a webhook, it behaves in the same way as manually running a Flow from the Flow Builder, as there's no specific input needed. For Flows that use a webhook however, the **webhook input of the re-ran flow will be used for the new Flow Run**.
Also, the new Flow Run will be marked as a re-run and link to the original Flow Run.

{% hint style="info" %}
When re-running a Flow that uses an [async webhook](/connectors/helpers/webhook-helper#async-webhook), the re-run will be ran right away as a regular webhook instead.
{% endhint %}
# Troubleshooting Flows
Depending on the type of error and Flow there are different ways to effectively troubleshoot Flows
## General
* For more complex Flows and errors we highly recommend to have the Flow Builder and Flow Debugger opened in multiple browser tabs to be able to quickly (without loading) jump between:
* Different runs (e.g. to compare why something worked in one run, but didn't in another)
* Flow Builder and Flow Debugger (e.g. to check the exact step configuration of a step that's currently opened in the Flow Debugger)
* If the Response code is `N/A` for a non-Helper (besides [REST Helper](/connectors/helpers/rest-helper)) step, then the issue most likely lays somewhere within the Flow (or you discovered a Locoia bug)
* Thus, if a step has a status code and it looks like you made the request correctly, the issue lies most likely somewhere on the third party's side
## Common errors
### Invalid syntax errors
#### Error
Errors like:
> invalid syntax. Perhaps you forgot a comma? (\, line 13501)
Are quite difficult to pinpoint and troubleshoot by it's own, as one doesn't easily know where the provided line number is.
#### Solution
1. Click **Download entire input** in the Flow Debugger
2. Run this command in the terminal while you're in the directory of the downloaded file: `sed -i '' -e '1s/^{"expression":"//' -e '$s/"\}$//' -e 's/\\"/"/g' -e 's/False/false/g' -e 's/True/true/g' -e 's/None/null/g' -e 's/\\n//g' filename`
1. `filename` needs to be replaced with the actual filename
2. This will make all the needed replacements for a valid JSON within a second or so
3. Then open the file in a code editor
4. Turn "Word Wrap" on, and do the JSON formatting, which will point out the error nicely
### Flow step cancellation
Flow steps may be canceled (Flow run status: `error`) due to specific conditions. Below are the categories of failures and their corresponding messages:
***
#### **1. Step Input Limit**
If the input size for a step exceeds the default limit (100 MB), the following error is raised:
```
Input size exceeds the limit of 100 MB.
```
***
#### **2. Timeouts**
If a step **times out** during execution (default is **15 seconds**), the following message is shown:
```
Step has been automatically cancelled due to timeout.
```
**Possible Causes**:
* A **slow API** is being called
* An **infinite loop** in Jinja code
***
#### **3. Step Output Limit**
The **Step Output Limit** enforces restrictions on the size of the data that a step during Flow execution can return. Depending on the feature settings and the connector type, there are two possible scenarios:
{% hint style="warning" %}
The **Step Output Limit** will soon be **enabled for all accounts** to prevent unexpected errors caused by processing large step output data. Customers are encouraged to proactively modify their Flows to handle smaller chunks of data.
{% endhint %}
1. **Step Output Size Exceeded (Feature Enabled)**\
\
If the Step Output Limit feature is **enabled** for the user's company, and the step output size exceeds the default limit (**50 MB**), the following error message is displayed:
```
Your flow execution was terminated due to the fact
that your output step data ({readable_response_step_size})
exceeded the current limit set for your account, {readable_locoia_step_size_limit}.
Please modify your flow logic to utilize smaller chunks of data.
If the problem persists do not hesitate to contact support.
```
**Implications**:
* The **Flow** is marked as "Error" in the debugger.
* The **Step** is marked as "Error," and users must inspect the step output for details.
**Action for Users**:
* Adjust the Flow logic to ensure smaller chunks of data are processed in each step.
* Contact support if the issue persists.
2. **Step Output Size (Feature Disabled or Connector = Looper)**\
\
If the Step Output Limit feature is **disabled** or the step uses the **Looper** connector, the step size is **not enforced**. In this case, the Flow proceeds, but it may result in unexpected behavior.
A **warning** is logged for debugging purposes:
```
Flow step exceeded step size limit. Flow ID {flow_id}, Company ID: {id},
Connector Name: {name}, Connector ID: {id}, Step Size: X bytes"
```
***
#### **4.** Processing Failure (Stuck Step)
When the step request cannot be processed at all, the following message is shown:
```
Step has been automatically canceled because we couldn't
process it after retrying it a few times. This most likely
happened because you try to process a lot of data (more than 100MB
or more than that are created in the process) or the third party API
responds very slowly. If none of these apply and you can't
resolve this issue, please contact Locoia support.
```
**Possible Causes**:
* Processing a large amount of data (over the memory limit).
* A slow response from a third-party API.
# Community Library
How can I find and reuse pre-templated Flows from the Community Library?
How can I find and reuse pre-templated Flows from the Community Library?
{% embed url="" %}
Locoia provides a wide range of **pre-templated** and **pre-built flows** that you can copy and modify to automate and solve your integration and automation challenges.
To copy a flow from there, go to [**Community Library**](https://app.locoia.com/#/community-library) and choose the flow you want to copy. By hovering over the description, you can see more details regarding the flow. To copy the flow to your account, click *Copy* on the right side:

After having copied the flow, you have to select the correct Connector Auths for the connectors, change any variables which are not default values and, depending on the flow, upload your own files:
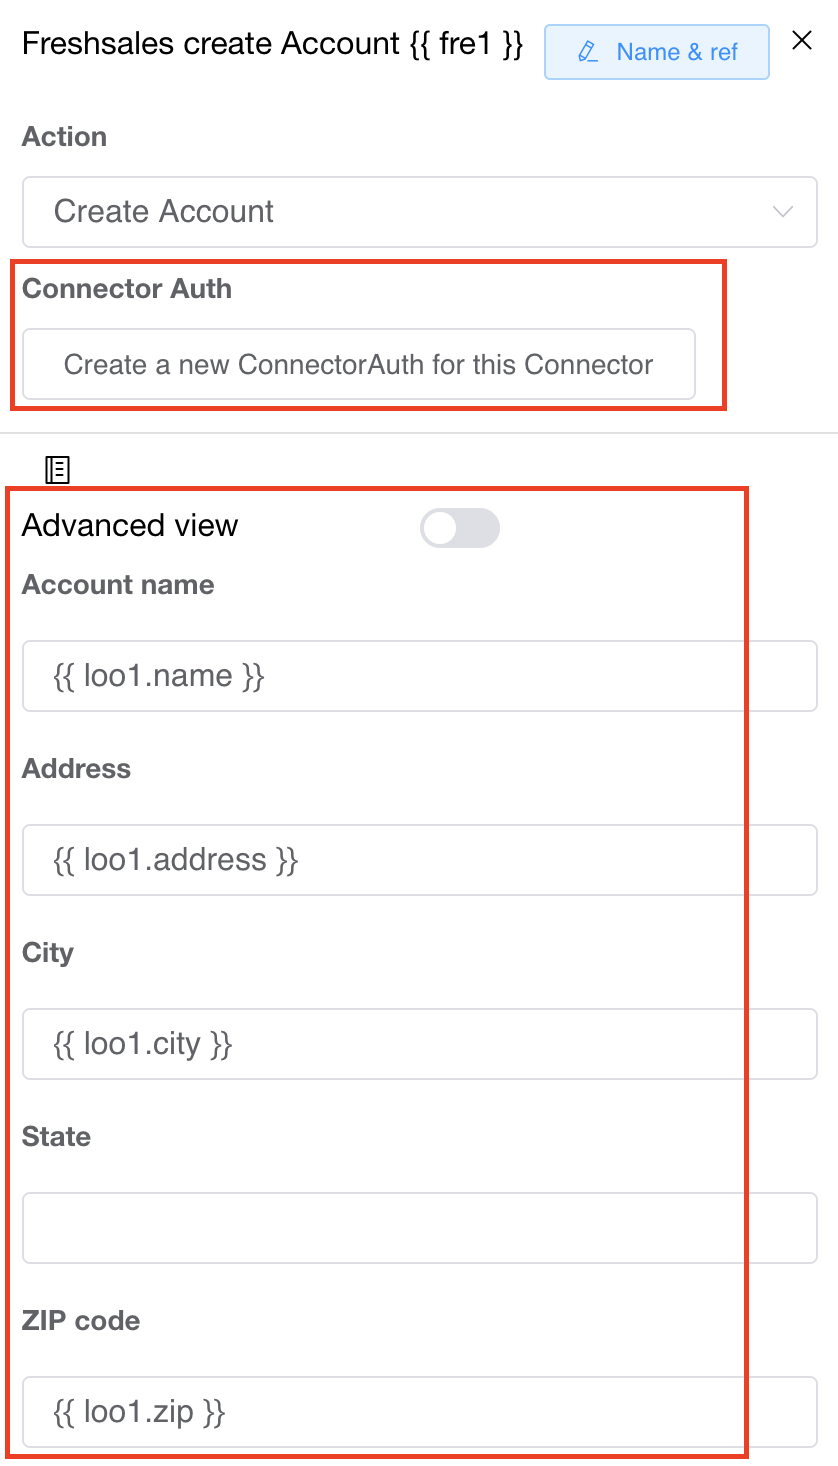
{% hint style="info" %}
The references to the other connectors used in the flows are already correctly set, e.g. loo1 in the example above does not need to be changed, only the reference after it, in case you use other column names in your file.
{% endhint %}
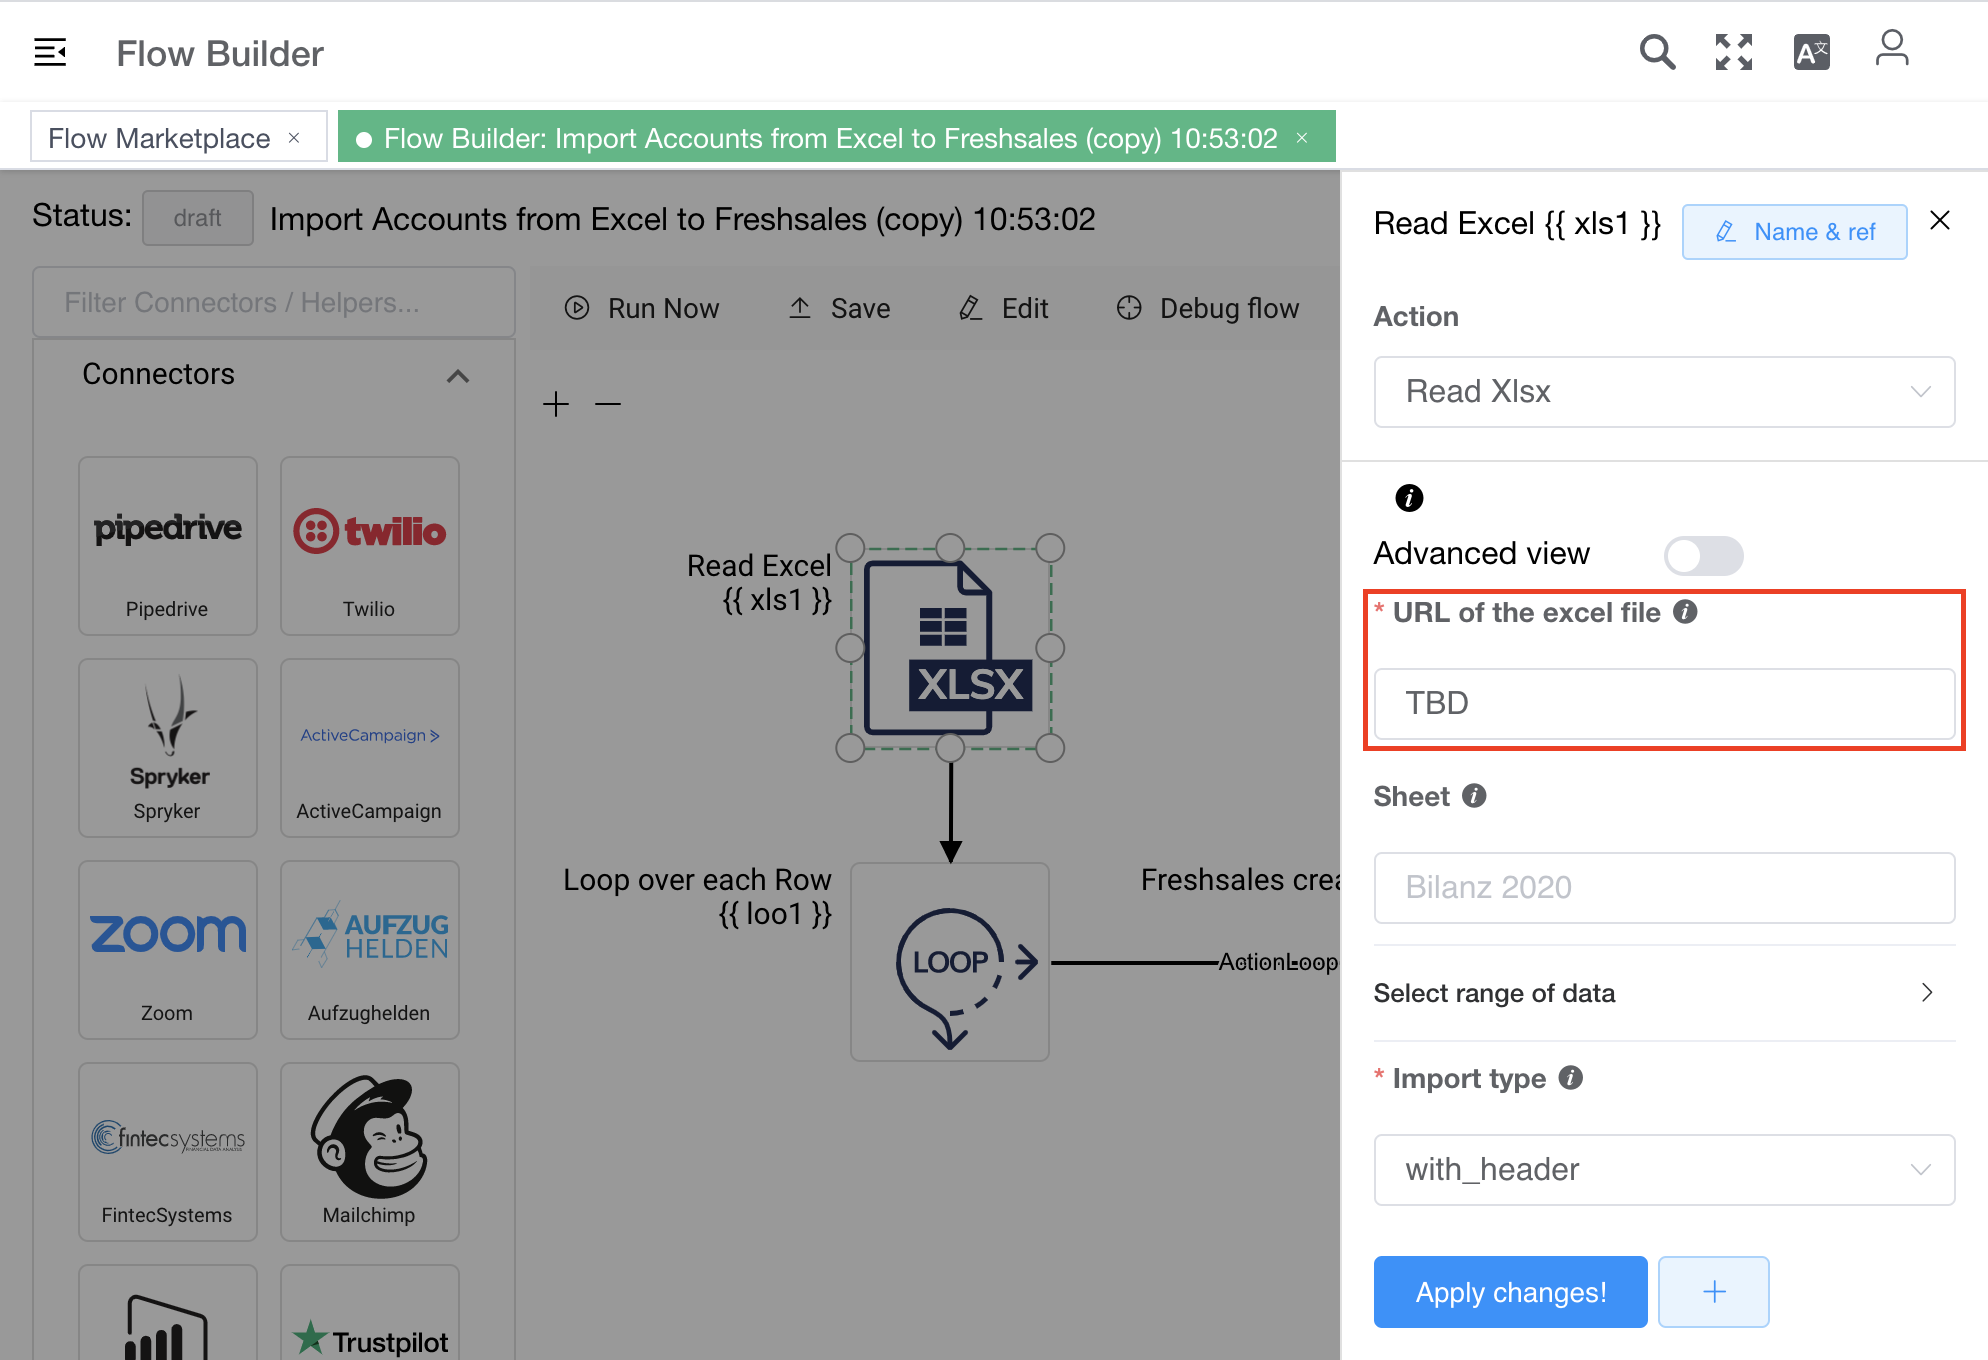
{% hint style="info" %}
You can also use the marketplace flows as a basis for a larger flow by extending upon them.
{% endhint %}
# Connectors
{% hint style="info" %}
Check out the **site panel** on the **left** for all Connectors!
{% endhint %}
# Monday.com
## Authentication
Install Locoia in your Monday.com account by following [this](https://auth.monday.com/oauth2/authorize?client_id=b7576850b75155673012c54053ed255b\&response_type=install) link. After successfully installing the app you can authenticate via Locoia with oauth2.
# ActiveCampaign
## Introduction
ActiveCampaign is a customer experience automation (CXA), combining email marketing, marketing automation, sales automation, and CRM features.
## ActiveCampaign Authentication
Under the menu Settings > Developer (url: ) get your
* endpoint url and ALWAYS overwrite the one on the ConnectorAuth in Locoia, e.g. with and your
* API key token to be included on
Screen in Locoia:

## Webhooks
You can register **webhooks** directly in the menu Settings > Developer.
[Overview of ActiveCampaign](https://www.locoia.com/connector/activecampaign-integration)
# Aircall
### Authentication
Authentication details [here](https://developer.aircall.io/api-references/#authentication).
[Locoia ConnectorAuth general docs](/connectors/authentication/setting-up-authentication)
### Aircall Webhook Trigger
Details on [Webhooks](https://developer.aircall.io/api-references/#webhook).
{% hint style="info" %}
Webhooks created by Locoia are **not** shown in the AirCall UI here:
You only see manually created Webhooks in the UI overview.
{% endhint %}
[Overview of Aircall](https://www.locoia.com/connector/aircall-integration)
# Allthings
## Authentication
[Oauth2 details](https://developers.allthings.me/developers/oauth.html)
# Amplitude
The base domain depends on where your Amplitude instance is hosted:
| Region | Endpoint |
| ------------------- | ------------------------------- |
| Standard Server | |
| EU Residency Server | |
# Animus
### Helpful links
* API swagger docs:
* App:
* Testing app:
* API base domain :
* API testing base domain :
### Important notes
* There are external\_id fields on almost all objects. They are NOT unique and you can create multiple objects with them.
* The external and internal calls for the same function; e.g. create apartment and create apartment by external id have the same functionality.
### Hierarchy of objects
* Quartier
* Projekt
* Objekt
* Wohneinheit
* Mieter
# Assetti
## Introduction
Assetti is a modern property asset management software with which you can optimally manage data on real estate, portfolios, and investments. We included more than 40 actions for you to use.
## Assetti Authentication
Assetti only requires the API token. You can include the API key right at Settings > ConnectorAuth in the Locoia UI:

## Nice to knows
Assetti's API only returns some fields if they are filled, e.g. `leaseAgreementStart` .
# Awork
Helpful links
* [API Docs incl. Oauth2 setup](https://developers.awork.io/)
* [Filtering](https://developers.awork.io/filtering)
# AWS RDS Database - How to connect
To connect DI to an existing or new Amazon RDS Database, you will have to take several steps.
1. **Make sure your Database's "Public accessibility" is set to "Yes"** (Click on your RDS Instance -> On the main page, under the "Connectivity& security" tab)\

2. **Whitelisting our static IP**
1. **Click on your VPC security group** (as visible above) and click **"Edit inbound rules"** under the **"Actions"** dropdown in the top-right corner:\

2. Click **"Add rule"**\

3. As **Type**, select **"PostgreSQL"**, enter the port of your DB-Instance (for PostgreSQL usually 5432), and **add our static IP** + /32 in the **"Source"** search. If you don't have our static IP yet, please contact us and we will provide it. The IP should look like this: 00.000.00.00/32
4. If you want, enter something like "Static IP Locoia" into the **description**, so you'll be able to find and edit this rule easily.
5. Click **"Save rules"**.
3. **If** you have outgoing rules set up on your VPC, you might need to repeat this process under the **"edit outbound rules"** option. By default, your VPC should allow all outgoing traffic.
4. At this point, **try connecting to the database** in DI. Most likely, you won't have to do anything else.
5. If you still encounter issues connecting to your DB instance, try checking your VPC settings:
1. On the same screen as in step 1, under **"Networking"**, click onto the **name of your VPC** instance:\

2. In the overview, click on the **ID of your VPC**:\

3. On the next screen, under the **"Details"** tab, click on the **"Main Network ACL"**:\

4. Just like in step 2, use the **"Action"** drop-down in the top right corner to check your **inbound and outbound rules**. By default, they should look like this:\
The **"Allow" rule** needs to be **located above the "Deny" rule** in order to work.\
If you have stricter rules set up, **white-label our IP** similar to step 2.
6. **You should now be able to connect to your database instance!** In case you are still experiencing issues, try connecting to your database through a different tool (such as [pgAdmin](https://www.pgadmin.org/)) from a whitelisted IP to ensure your database is exposed as intended. If you are unable to connect, please discuss with your sysadmin, as your organization might enforce even stricter rules on RDS. If you are able to connect from a 3rd-party tool, but can't connect from DI, please contact us so we can investigate the issue.
# bubble.io
## Introduction
Insights on the Data API of Bubble.io can be found [here](https://manual.bubble.io/core-resources/api/data-api#general-data-endpoint).
## bubble.io Authentication
The different authentication method can be found [here](https://manual.bubble.io/core-resources/api/introduction).
[Locoia ConnectorAuth general docs](/connectors/authentication/setting-up-authentication)
[Overview of bubble.io](https://www.locoia.com/connector/bubble-integration)
# Casavi
## Casavi API Integration Documentation and Authentication
## Introduction
Casavi is the leading platform for digitization in real estate management.
Base url: `https://api.mycasavi.com/`
[Casavi's system-status can be seen here](https://status.mycasavi.com/).
## Casavi Authentication
Casavi uses and a key and secret that is provided by Casavi itself. The user has to provide it upon authentication. There is no refreshing mechanism, but the token received upon initial authentication is valid for one month in the standard-setting.
1. To start authentication make a POST against with the header Content-Type: application/json\
The body should be\
`{`\
`"key":"xyz",`\
`"secret":"xyz"`\
`}`\
While the details are provided by Casavi
2. You will receive back:\
`{`\
`"token": "xyz",`\
`"expiresAt": "2020-12-10T20:52:53Z"`\
`}`
3. Start making request with the header token: xyz-your-token e.g. `https://api.mycasavi.com/contacts`
## Pagination
All GET request collections have the below three attributes that define the number of objects, the current page and the total pages:
* "count": 67,
* "page": 0
* "pageCount": 3
```
{
"count": 67,
"page": 0,
"pageCount": 3,
"content": [
{
"id": "235655-43",
"internalId": 123456,
"title": null,
"salutation": null,
"firstName": null,
"lastName": null,
"companyRole": null,
"email": null,
"telephone": null,
"mobile": null,
"fax": null,
"website": null,
"street": null,
"postalCode": null,
"city": null,
"country": null,
"company": "blabla KG",
"isRegistered": false,
"preferredWayOfContact": "ONLINE"
},
...
```
## IDs in Casavi
Casavi has two types of IDs:
* External IDs (this is the `id` field in the API)
* Internal IDs (this is the `internalId` field)
The external ID can come from a third party system and is used in all API calls when an id has to be provided (e.g. [`getContactById`](https://api.mycasavi.com/docs/manager#operation/getContactById) expects the external ID, or when creating a post the external staff id has to be provided for the field `authorId`)
# Chargebee
## Introduction
Chargebee lets you manage subscriptions at scale, handle custom recurring billing scenarios, reduce subscription churn and simplify accounting.
## Chargebee Authentication
Note, you have to change the **base domain** in the Connector Auth, depending on **your account domain** and whether you go on **testing** or **production**: https\://{site}.chargebee.com/api/v2/ e.g. or for production.
[Locoia ConnectorAuth general docs](/connectors/authentication/setting-up-authentication)
## Chargebee Webhook Trigger
[Webhooks can be setup here](https://www.chargebee.com/docs/1.0/webhook_settings.html).
[Overview of Chargebee](https://www.locoia.com/connector/chargebee-integration)
# CleverReach
## Introduction
Create and send simple newsletters or complex, automated email routes - email marketing with CleverReach®.
## CleverReach Authentication
1\. Depending on whether you have already an account or not, select the corresponding:
2\. In case you have an account, enter your details and login:

[Overview of CleverReach](https://www.locoia.com/connector/cleverreach-integration)
# comgy
comgy digitizes the measurement, visualization and billing of heat, water and electricity consumption in real estate.
**Helpful links**:
* [OpenAPI Docs](https://api.comgy.io/api-docs/index.html?urls.primaryName=PUBLIC%20API%20v0)
* [Getting started with the comgy API](https://www.notion.so/Getting-started-with-the-comgy-API-017b49b9047c41d3b3a1e3a85964b240)
* [Main Data and Meter Data exchange](https://www.notion.so/Main-Data-and-Meter-Data-exchange-c28f58d05921432eb7d8aef2781f2d9c#b8597310443c49558681843feee3197e)
# commercetools
### Authentication
Login to your commercetools account. In the left side panel click **Settings** > **Developer Settings** and create an API client with your scopes. Once complete, you will receive client\_id and client\_secret.

Docs by commercetools on authentication are [here](https://docs.commercetools.com/api/authorization).
# Everreal
## Introduction
EverReal - the real estate software for the future of property managers, housing companies, and brokers.
## Authentication and REST API Docs
EverReal's [API documentation](https://app.everreal.co/api/prism/meta/api-docs) can be found here.

## GraphQL API (new)
The GraphQL API is ideal for Master Data syncs:
* Docs:
* Endpoint:
Common Objects:
* Listing
* Properties
* Tenants
* Units
* Owners
## Webhook
Details on automatic [webhook registration are here](https://api-docs.everreal.co/webhooks/unit_created).
# Exact Online
Cloud business software for SMEs and their accountants
## Introduction
Exact Online is an online accounting and ERP software.
## Authentication
1. Before authentication Exact with Locoia, please ensure your user has all authentication, as per [here in Exact](https://start.exactonline.de/docs/MenuPortal.aspx?SsC=1).
2. You can simply use your Exact user credentials in Locoia to authenticate.
{% hint style="info" %}
**No** Exact app creation is needed by you. We did this for you.
{% endhint %}
## Good to know
The Exact API is very extensive, thus there are some extra tipps for working with the Exact Connector:
* The [documentation](https://start.exactonline.nl/docs/HlpRestAPIResources.aspx?SourceAction=10) is very important and it makes sense to use it, in parallel with the Connector Action
* To find endpoints quickly, use the Endpoint Search field
* There are almost always links to details for endpoints
* `GET` and `POST` fields are not the same (fields are shown, by selecting a method at the top)
* `!` means required field
* Many requests bodies are quite nested and often required fields and the nested structures need to be provided
* [Filtering works with OData Syntax](https://www.odata.org/documentation/odata-version-2-0/uri-conventions/) (don’t forget to set quotation marks); unfortunately there are no good examples in the documentation
* `POST` requests don't return response payload, instead a `GET` call needs to be made afterwards to get the actual data
* `POST` actions are not added in Locoia, as the format is quite custom, instead the POST Wildcard Action should be used
* In general there are lots of dependencies between entities
# Facebook Marketing
Facebook custom audiences
##
## Helpful links
* [API Versions](https://developers.facebook.com/docs/graph-api/changelog/) - latest **v11.0** as of August 2021.
* Permissions and [Scopes](https://developers.facebook.com/docs/marketing-api/overview/authorization).
* Base URL: /
* Test Facebook Graph API Playground:
## Finding User and Page IDs
You need to know your Facebook User and Page IDs for a few actions, here is how to find them.
### User ID
1. Go to the Facebook [**Business Integrations** settings](https://www.facebook.com/settings?tab=business_tools\&ref=settings) with the Facebook user you used to authenticate with Locoia
2. Click on **View and edit** next to the Locoia integration
3. Scroll to the very bottom to see your user ID.

### Page ID
To find your page ID, you can follow the [official Facebook instructions](https://www.facebook.com/help/1503421039731588/?cms_platform=www) (here a direct link to [your Facebook pages](https://www.facebook.com/pages/?category=your_pages)).
## Use Cases
### Facebook Lead Ads
Retrieving Leads API docs by Facebook can be [found here](https://developers.facebook.com/docs/marketing-api/guides/lead-ads/retrieving/).
You can find your lead ads forms and form IDs [here](https://business.facebook.com/latest/instant_forms/forms).
#### Rate Limits
200 multiplied by 24 multiplied by the number of leads created in the past 30 days for the Facebook page.
### Custom Audience Uploads
You can find your Facebook ad account id on the [page here](https://www.facebook.com/ads/manager/account_settings/information/). It is in the upper right or in the URL. You should replace it in the above URL with {{ ... }}. So a final URL can look like `https://graph.facebook.com/v11.0/act_1234567890/` followed by the endpoint, `customaudience`
{% hint style="warning" %}
The **Data Processing Terms** need to be accepted to upload custom audiences:
1234567890 has to be replaced with the respective account id.
{% endhint %}
For app builders: Any app needs at least the scopes `ads_management` to have access.
#### 1. Creating a custom audience with Curl
```python
curl -X POST \
-D '{
"name": "My new Custom Audience 1",
"subtype": "CUSTOM",
"description": "People who purchased on my website",
"customer_file_source": "USER_PROVIDED_ONLY"
}' \
-H 'Content-Type: application/json' \
-H 'Authorization: Bearer {{ token }}' \
https://graph.facebook.com/v12.0/act_{{ my ad account id }}/customaudiences
```
#### 2. Adding mobile device data using Curl
```python
curl -X POST \
-D '{
"payload": {
"schema": [ "MADID" ],
"data": [
[
"{{ my mobile device id }}"
],
[
"{{ my mobile device id }}"
]
]
},
"session": {
"session_id": "{{ some session id }}",
"batch_seq": 1,
"last_batch_flag": true,
"estimated_num_total": 2
}}' \
-H 'Content-Type: application/json' \
-H 'Authorization: Bearer {{ token }}' \
https://graph.facebook.com/v12.0/{{ my audience id }}/users
```
**Error explanation** page can be [found here](https://developers.facebook.com/docs/marketing-api/error-reference/?locale=de_DE).
{% hint style="info" %}
If your JSON is malformatted, you will get **this error**: { "error": { "message" : "(#100) Invalid parameter", "type": "OAuthException", "code": 100,"fbtrace\_id": "some id" } }
{% endhint %}
#### Endpoints
* Creating a Custom audience based on CRM or similar data - [Customer File Custom Audiences](https://developers.facebook.com/docs/marketing-api/audiences/guides/custom-audiences). Creating manually as a user, can be found here In order to make this endpoint work, you need to connect it with a business.
# Fahrländer Partner
FPRE provides market data, valuation models and benchmarks via standardized interfaces (API) and thus enables seemless integration into digital processes.
## Fahrländer Authentication
The Fahrländer Webservice requires an authentication by username and passwort for each request. Please enter your Fahrländer login data as *Flow Environment Variable* fahrlaender\_login so that you are able to reuse it for all your flows.

To set who can see the login data, please click on the "sharing" button. By default all users of your Locoia account can see the login data.

In your flows you can use the variable with a Fahrländer connector in "Advanced view" for user `{{ fahrlaender_login.user}}` and password `{{ fahrlaender_login.password}}` like displayed below.

# FastBill
### Helpful links
* API docs:
### Authentication
FastBill uses and API key, which can be found under your **avatar** (name in the upper right corner); then click on settings ("**Einstellungen**") and scroll all the way to the **bottom**.
You need your login email and your API key for authentication.
# FILESTAGE.io
## Introduction
Overall API docs:
## FILESTAGE.io Authentication
There are two environments with the corresponding endpoints:
1. Production (default on Locoia):
2. Staging:
## FILESTAGE.io Webhook Trigger
Webhooks have to be registered manually, as per the [docs here](https://developers.filestage.io/docs/api/4.%20Webhooks.md).
[Overview of FILESTAGE.io](https://www.locoia.com/connector/filestage-integration)
# Freshdesk
## Authenticate Freshdesk
To authenticate Freshsales:
1. Go to Settings > Connector Auth
2. Click **Add**
3. In the opened dialogue window, select Freshdesk as a connector
4. Enter a name for the Connector Auth (this is used for reference later)
5. Enter your complete subdomain, including the latest API version (as of March 2021 v2), e.g.\
`https://your_company.freshdesk.com/api/v2/`
6. Enter your Freshdesk API key ([How to find your Freshdesk API key](https://support.freshdesk.com/support/solutions/articles/215517-how-to-find-your-api-key))
7. Click *Confirm*

# Freshsales
### Authenticate Freshsales
To authenticate Freshsales:
1. Go to Settings > Connector Auth
2. Click **Add**
3. In the opened dialogue window, select Freshsale as a connector
4. Enter a name for the Connector Auth (this is used for reference later)
5. Enter your complete subdomain, e.g. https\://`your_company`.freshsales.io/api/
6. Enter your Freshsales API key ([How to find your Freshsales API key](https://support.freshsales.io/support/solutions/articles/220099-how-to-find-my-api-key-))
7. Click *Confirm*

# Google Ads
Google Ads (formerly Google AdWords) is an online advertising platform by Google.
## Introduction

The Google Ads connector can be used to interact with Google Ads, for example to upload conversions.
The official REST API documentation can be found here:
{% embed url="" %}
{% hint style="info" %}
Google Ads offers a few different APIs, we only use the linked REST API.
{% endhint %}
## Authentication
Google Ads uses OAuth2 authentication and additionally a **Developer Token** and, in some cases, **Login Customer ID** have to be provided in every action:
* Developer Token: You can [obtain a Google Ads Developer Token by following this guide](https://developers.google.com/google-ads/api/docs/first-call/dev-token)
* Login Customer ID: Only required for Google Ads API calls made by a manager to a client account. You can [find more information here](https://developers.google.com/google-ads/api/rest/auth#login_customer_id).

## Reporting with Queries
Google Ads provides an SQL-like query language that is [explained here](https://developers.google.com/google-ads/api/docs/query/grammar). This is the best way for reporting. The easiest way to build reporting queries is the [Query Builder](https://developers.google.com/google-ads/api/fields/v9/ad_group_query_builder).

## Actions
### Conversion Uploads
You can upload click and call conversions using this Connector, there are a few setup and mapping steps needed in order to use these actions successfully.
#### 1. Create import conversion Action
In your conversion actions you have to create a new import conversion action first (Google also calls them "offline conversion" in some places):

You can find more details on how to do that in this article:
{% embed url="" %}
#### 2. Get Conversion Action ID
It is quite difficult to find the Google Ads Conversion Action ID, as Google, unfortunately, does not provide an endpoint to get them and they also cannot be found in the Google Ads platform itself.
However, you can find the Google Ads Conversion Action with a little workaround:
1\. Go to your Google Ads Conversion overview

2\. Open the developer tools (Mac: `Cmd ⌘` + `Opt ⌥` + `I` | Windows: `Ctrl / Strg ⌃` + `Shift ⇧` + `I`)
3\. Go to **Network** panel, set the filter to **Fetch/XHR** and make sure that there are no requests (you can clear the request using the clear icon)

4\. Click on the conversion action name for which you want to get the id
5\. Click on the first request (the one that includes `ConversionTypeService` in the name)

6\. Go to the **Preview** tab
7\. Expand the dictionary with the key `1` and then the one inside it with the key `0`
8\. The Google Ads Conversion Action ID is the number that you can then see inside the expanded dictionary as the value for the key `1`

9\. Copy this number and add it to the respective field in the conversion upload action
{% hint style="success" %}
This is the Conversion Action ID for both click and call conversions.
{% endhint %}
# Google Ads Lead Form
Google Ads Lead Form extension to collect leads right in the search engine results.
1. On any flow, drag in the [Webhook Helper](/connectors/helpers/webhook-helper) as a trigger to the flow workspace
2. Click on `Edit` and copy the webhook URL
3. Lear how to setup the **Google Ads Lead Form** [via webhooks here](https://support.google.com/google-ads/answer/10089407). Paste the Webhook url provided by Locoia
4. Go back to Locoia and continue your flow using the provided data

# Google Analytics
Google Analytics is the measuring tool for advertising ROI and user behaviour.
### How to find the Google Analytics Profile ID?
Once you log into Google Analytics, you can easily find the Google Analytics Profile ID (view id) if you look at the url and take everything behind the `p` marked in blue below.

This is the ID of the view and needs to be inputted as the ids in the format `ga:1234567890`, having ga: as a prefix, as per the below.

### Building Google Analytics search queries
To build your data queries, use the by Google provided tool:
### Things to be careful with Google Analytics
Pre-computed metrics can e.g. include deduplication of users to get to unique users for a timeframe. E.g. a comparison of the last seven days total users vs. daily users per each day individually and then summed up, yields different results. The reason is that a user who visits the page every day will be counted once in the first instance and seven times in the second one.
To avoid this, the time granularity should be the same to the data being displayed.
# Google Chat
Google Chat is a work-focused communication tool
Our Google Chat Connector supports authenticating as a user (via OAuth2) and authenticating as a Chat App (via a Service Account).
## Access on behalf of a Chat App
If you want to send messages on behalf of a Chat App or do any other actions as a Chat App, you'll need to follow these steps:
1. [Create a Service Account as described here.](https://developers.google.com/chat/api/guides/auth/service-accounts#step_1_create_a_service_account_in_google_cloud_console)
2. Create a Connector Auth with Auth type **refreshable\_token**\
The needed credentials come from the JSON file that you received in step 1
# Google Drive
## Introduction
To download any files, use the **Get File** actions. To download Google documents only, use the **Download File** action.
## Webhook triggers
Webhooks can be created for individual files or for all changes of a user.

## Google Drive scopes
The following two scopes are given per default, as per the [documentation here](https://developers.google.com/drive/api/v3/about-auth).
*
*
## Exporting PDFs and other MIME Types
To export any G-Suite document, you can simply use the Download File action and specific the document type, e.g. `application/pdf` for PDFs. All MIME types are here:
This applies for:
* Google Docs
* Google Sheets
* Google Slides
* other documents
# Google Sheets
Use Google Sheets to create and edit online spreadsheets.
## Actions
### Add Rows
The Add Rows actions requires an exact range to be provided, i.e. the number of rows that are being inserted must match the number of rows in the range field.
In order to achieve this dynamically, the number of rows can be calculated right in the range field, with `{{ row | length + 1 }}` (assuming the first row are used for the headers, thus 1 rows needs to be added to the length).

## Troubleshooting Errors
Some errors Google Sheets returns are unfortunately not straight forward to understand and troubleshoot. Here is an overview over some common errors and the possible reasons for it.
| Error message | Possible reasons |
| ----------------------------------------- | ---------------------------------------------------------------------------------------------------------------------------------------------------------------- |
| Unable to parse range: *SheetTitle:Range* |
The SheetTitle does not exist in the Spreadsheet
The range does not match the number of rows/columns specified in the request
|
# Gmail
## Introduction
The Gmail connector can be used to read, modify and send emails and attachments.

{% hint style="info" %}
The [Gmail API documentation](https://developers.google.com/gmail/api/reference/rest) and thus the actions as well, use the terms "Email" and "Message" interchangeably.
{% endhint %}
## Gmail scopes
You can give access to the following scopes:
* [https://www.googleapis.com/auth/gmail.send]()
* [https://www.googleapis.com/auth/gmail.modify]()
* [https://www.googleapis.com/auth/gmail.compose]()

## Common Use Cases
### Mark email as read
In order to mark an email as read you need to use the **Modify Message** action and remove the label `UNREAD`.

### Trigger Flow based on new Gmail email
There are many use cases, where a flow should be triggered based on a new Gmail email.
As Gmail does not support webhooks out of the box, we offer a [template flow which polls Gmail regularly to check for new email](https://app.locoia.com/#/community-library?page=1\&perPage=10\&nameSearchString=new%20Gmail%20email\&sortProp=reference\&sortOrder=ascending) and based on that triggers a flow for each new email.
### Replying to emails
The **Send Email** action also allows to reply to emails, so that the email that is being sent is added to an email thread.
To get started with that functionality, we highly recommend to use [this template flow](https://app.locoia.com/#/community-library?page=1\&perPage=10\&nameSearchString=Reply%20to%20Gmail%20Email%20Message\&sortProp=reference\&sortOrder=ascending), as it requires some advanced knowledge to configure the details on your own, due to the nature of how email works.
In order to reply to emails the following fields need to be filled as specified:
* Subject: The subject must match the subject of the email that is being replied to
* Thread ID: The ID of the thread the message belongs to
* In-Reply-To and References Address: This must be set according to the Message-Id of the email that is being replied to

In order to retrieve these required values, the **Get Message** action should be used, as it returns all these values. A working example, which also handles some non-standard email client implementations [can be found here](https://app.locoia.com/#/community-library?page=1\&perPage=10\&nameSearchString=Reply%20to%20Gmail%20Email%20Message\&sortProp=reference\&sortOrder=ascending).
{% hint style="warning" %}
Not all email clients follow the same standards regarding headers, thus there might be slight differences in the header names for each email, this is e.g. the case for the `Subject` or `Message-Id` header.
{% endhint %}
## API Usage Limits
The [Gmail usage limits](https://developers.google.com/gmail/api/reference/quota) are fairly generous and as long as you do not send a lot of emails per second for a longer period of time, you should not run into any issues.
{% hint style="info" %}
These limits come directly from Gmail and we can unfortunately not increase them.
{% endhint %}
# HubSpot
Details on usability and limitations of the Hubspot Connector in Locoia.
### General
All programmatic standard properties in Hubspot are referenced in **lower-case and without any \_ or spaces**. E.g. the property group \`Deal Information\` is referenced programmatically with \`dealinformation\`. If you create custom properties yourself, you can use \_ underscores.
### Internal IDs
The HubSpot API works with **internal IDs** often. To find them out,
1. Go to \`\* your account id \*/properties\

2. Click on the `Select an Object` drop down and select the object you want to find IDs for:\

3. Click on any field, then click on the **\** button and you will the the **field's ID**, highlighted in **blue** in the screenshot below:\

### Webhooks in Hubspot
HubSpot webhooks are limited in a way that only allows them to be configured by app and not by account. Thus they cannot be used for Locoia.
However, HubSpot offers a workflow feature for all Marketing and Sales Hub Professional accounts. It is possible to setup Webhooks with custom URLs in Workflows, so these can communicate with Locoia. More details can be found in the [HubSpot documentation](https://knowledge.hubspot.com/workflows/how-do-i-use-webhooks-with-hubspot-workflows).\
\
When setting up a webhook to be fired e.g. whenever a certain property on an object is changed, remember to use the automatic re-enroll functionality, so the webhooks will get fired more than once, and, if wanted, make sure to enroll all existing object when enabling the workflow.
### Hubspot Search API
[Hubspot Search API Documentation](https://developers.hubspot.com/docs/api/crm/search)
The Hubspot Search API allows very flexible search queries and makes it easy to return a large number of results matching said queries. It allows you to combine both **AND and OR** logical operators, with a **maximum of 3 OR statements**. While very convenient, the Search API comes with several limitations which you should be aware of:
### Propagation Time
For every object type (contacts, deals, companies, etc.) you will find a "Search" action in our tool. Please be aware that **changes made by other API calls will take several seconds to propagate to the search indexing**. So if you, e.g. set a property on a contact, and search for that property immediately, the **contact might not get returned**. To avoid this issue, consider placing a [Delay Helper](/connectors/helpers/delay-helper) in your flow, to pause it for some time before querying, or save the IDs of changed object to manually add them to search results.
### Rate Limits
The Search API has far stricter rate limits than other Hubspot API endpoints (**maximum of 4 Requests per second**), so you might run into a **429 Error** whenever your flow runs really fast. **Consider adding small delays** of \~100-200ms to ensure that your flow stays within rate limits. General Information on Rate limits can be found in the [Hubspot Documentation](https://developers.hubspot.com/docs/api/usage-details#rate-limits).
### Further Limitations
In addition to the rate limits described above, any Search API endpoint can return a **maximum of 10,000 results** (with a limit of 100 results per page). Trying to page beyond 10,000 results will return an error.\
If you require more than 10,000 results, consider either segmenting your results into smaller groups using existing properties, add a new property (e.g. called "Query Batch" or similar) to your records, or use the list endpoints of the CRM API and do the filtering yourself.
All limitations can be found in the [Search API documentation](https://developers.hubspot.com/docs/api/crm/search#limitations).
# Heyflow
Heyflow helps you create, design and integrate interactive flows.
{% hint style="info" %}
**Requirements**: Active Heyflow subscription
{% endhint %}
### Steps to integrate
1. On any flow, drag in the [Webhook Helper](/connectors/helpers/webhook-helper) as a trigger to the flow workspace
2. Click on `Edit` and copy and paste the webhook URL
3. Switch to the Heyflow App
4. Go to the "Integrate"-section within the Heyflow App

5\. Choose **\`Webhook API\`** as integration
6\. Insert the copied Webhook-URL from Locoia in the field
7\. Switch to the `Publish`-section of the Heyflow App
8\. Click on `Publish my flow` to update the connection
9\. Generate some data in your Flows
10\. Go back to Locoia to your flow and see data coming in
{% hint style="info" %}
Further details on webhooks:
{% endhint %}
# iDWELL
You can find the iDWELL API Documentation here:
{% embed url="" %}
# ImmobilienScout24
### Authentication
Authentication details can be [found here](https://api.immobilienscout24.de/api-docs/authentication/three-legged/).
[Locoia ConnectorAuth general docs](/connectors/authentication/setting-up-authentication)
### ImmobilienScout24 Webhook Trigger
# Instagram Ads
Creating an Instagram [Account Custom Audience](https://www.facebook.com/business/help/214981095688584):

# Intercom
## Introduction
Conversational, messenger-based omni-channel customer communication platform.
## Intercom Authentication
Details can be found [here externally by Intercom](https://developers.intercom.com/building-apps/docs/authentication-types).

[Locoia ConnectorAuth general docs](/connectors/authentication/setting-up-authentication)
## Webhooks
How to setup a Webhook in intercom (manually) is documented here [Docs](https://developers.intercom.com/building-apps/docs/setting-up-webhooks) of intercom.
[Overview of Intercom](https://www.locoia.com/connector/intercom-integration)
# klaviyo
### klaviyo Authentication
1. Go here in your klaviyo account:
2. Create a Private API key

# Kiwi Opening Doors
## Introduction
[Keyless with KIWI](https://kiwi.ki/). The KIWI platform opens the door for you digitally.
## Kiwi Opening Doors Authentication
To authenticate, get your username and password and include it on the ConnectorAuth in our on Settings > ConnectorAuth:

[Overview of Kiwi Opening Doors](https://www.locoia.com/connector/kiwi-integration)
# Klenty
Sales Engagement Software to send personalized emails & automated follow-ups at scale
### Getting started
Where to find the Klenty API key?
The API key of Klenty can be found here:
Using the UI, in the left side panel, click Settings, then look to the right to the overview panel integrations, click API.
### Webhooks
Webooks need to be manually setup in Klenty on the screen where you find the API key, as per the above explanation.
# Klipfolio
Automate the monitoring, exploration and sharing of your metrics and KPIs using Klipfolio's real-time dashboard and analytics platform.
{% embed url="" %}
# Kolibri CRM
https\://kolibri.software
Authentication method: Locoia uses the 2-legged login with client\_id and secret.
### Helpful links
* Login Sandbox UI:
* Login Production UI:
* API Docs:
* Developer Oauth2 Login:
# konfipay
Helpful links:
* [API Docs](https://portal.konfipay.de/api-docs/index.html) can be found here.
* [Further documentation](https://windata.atlassian.net/wiki/spaces/DOCS/pages) of konfipay.
# KUGU
## Introduction
KUGU Home is the platform for digital building management. It digitizes the processes for property managers, energy companies, and housing associations.
[API Swagger UI](https://development.portal.kugu.cloud/api/)
[Swagger Doc](https://development.portal.kugu.cloud/api/swagger.json)
## KUGU Home Authentication
Authentication works via OAuth2 and **Keycloak** at https//auth.kugu.cloud
Known limitations of DI integration:
* No pagination yet included
[Overview of KUGU Home](https://www.locoia.com/connector/kugu_home-integration)
# Shopify
### Webhooks
How to register webhooks with Shopify can be [found here](https://shopify.dev/apps/webhooks/configuration/https#step-1-register-an-endpoint).
### GraphQL Docs
{% embed url="" %}
# S3 AWS
## Introduction
S3 = Simple Storage Service
## S3 AWS Authentication
`Base domain to be included in Connector auth:` \
`https://s3.eu-central-1.amazonaws.com`

### Actions
{% hint style="warning" %}
If you use special characters in your file paths, you might have to [URL encode](https://www.urlencoder.org/) these explicitly in order for S3 to interpret them correctly.
If you get an error with the code `SignatureDoesNotMatch`, encoding special characters will most likely solve this.
{% endhint %}
#### List Objects
If a bucket policy just allows accessing **sub-folders within a bucket**, one has to define the bucket and the sub-folder as bucket in the `Bucket` field in order to get a 200 response.

## S3 UTF-8 content type encoding of files
**UTF-8 encoding and what may go wrong?**
Why you may get strange characters instead of your desired üäöß and similar characters? The Locoia app depends on the **Content-type header** provided by a server, API-endpoint or drive (GoogleDrive, Dropbox or AWS S3) and treats the file as such. Meaning, either your server, API-endpoint or drive already has the appropriate header set, which will be mostly UTF-8 due to wide usage, or you need to explicitly set it.
The popular software **AWS S3** does not set it manually during the upload of files in step three, as per the below image:

Within **step three**, the user needs to set it as per the below screenshot to:
```markup
content-type: application/csv;charset=UTF-8
```
Generic

Thus, the Locoia app treats the file as UTF-8.
[Locoia ConnectorAuth general docs](/connectors/authentication/setting-up-authentication)
[Overview of S3 AWS](https://www.locoia.com/connector/s3_aws-integration)
# SQS AWS
## Introduction
Amazon Simple Queue Service (SQS) is a fully managed message queuing service that enables you to decouple and scale microservices, distributed systems, and serverless applications.
## SQS AWS Authentication
SQS AWS requires the following credentials to authenticate:
* **AWS Access Key** - this is your Access Key ID for each IAM-user
* **AWS Access Secret** - this is your Secret access key given to you during the key creation
* **AWS Region** - z.B. eu-central-1
These keys are displayed upon AWS account or IAM user creation. Should you require new ones, follow these [instructions here](https://docs.aws.amazon.com/sdk-for-javascript/v2/developer-guide/getting-your-credentials.html) or [here](https://docs.aws.amazon.com/sdk-for-javascript/v2/developer-guide/getting-your-credentials.html).
## AWS regions SQS can be used in
The most commonly used region is: Europe (Frankfurt) with queue URL: sqs.eu-central-1.amazonaws.com
All Regions can be found [here](https://docs.aws.amazon.com/general/latest/gr/sqs-service.html).
[Overview of SQS](https://www.locoia.com/connector/sqs_aws-integration)
# Lambda AWS
## Introduction
AWS Lambda is a serverless function that lets you run code without the need to managing servers. AWS Lambda runs code on demand and scales dynamically.
## Lambda AWS Authentication
Lambda AWS requires the following credentials to authenticate:
* **AWS Access Key** - this is your Access Key ID for each IAM-user
* **AWS Access Secret** - this is your Secret access key given to you during the key creation
These keys are displayed upon AWS account or IAM user creation. Should you require new ones, follow these [instructions here](https://docs.aws.amazon.com/sdk-for-javascript/v2/developer-guide/getting-your-credentials.html) or [here](https://docs.aws.amazon.com/sdk-for-javascript/v2/developer-guide/getting-your-credentials.html).
## AWS regions Lambda can be used in
The most commonly used region is: Europe (Frankfurt) with queue URL: lambda.eu-central-1.amazonaws.com
All Regions can be found [here](https://docs.aws.amazon.com/general/latest/gr/Lambda-service.html).
[Overview of Lambda](https://www.locoia.com/connector/lambda_aws-integration)
# Learnster
### Learnster Authentication
1. Create `Client ID` and `Client Secret` here
2. Give it a name like `Locoia Credentials`
3. Copy your Vendor ID
4. Go to Settings > Connector Auth in Locoia
5. Click the Add button and select "Learnster" as a connector
6. In the form add your Client ID, Client Secret
7. Add as a `Base Domain` Auth endpoint ending in your Vendor ID, like:
```
https://YOUR-SUBDOMAIN.learnster.com/api/public/v1/auth/vendor/some-uuid4-123-039s-344f7b7a518d/
```

# lexoffice
## Introduction
[Change log of lexoffice](https://developers.lexoffice.io/docs/#change-log).
## lexoffice Authentication
Authentication is simply done via an API Key or Access key, as described [here](https://developers.lexoffice.io/cookbooks/public-api/#lexoffice-api-kochbuch-public-api). API Keys can be generated and [changed here](https://app.lexoffice.de/login?redirect=%2Fsettings%2F%23%2Fpublic-api), after logging in.

## Special notes
When creating a contact, you can either create a contact or a company in the same request, not both (as you can see in the UI).
Webhooks and events can be registered [here](https://developers.lexoffice.io/cookbooks/public-api/#events-und-webhooks).
# LineMetrics
## Introduction
LineMetrics provides an easy way to collect sensor data in existing buildings. Retrofit wirelessly and optimize building operations with Insights.
To get the last data of a sensor,
### Accessing objects via **Custom Key / Alias**:
In the object tree (main tab Objects) you can create individual objects and create measuring points in the objects. You can then assign a data source to a measuring point.
If you are on the side of the measuring point, you can assign a so-called alias for this measuring point, for example “temperature”, at the top right on Actions -> API information... You will then be shown the correct influx key / alias combination. Thus, you can either find the UID or define the route yourself
To get all objects, query: /v2/children
You can then query the child objects for each received object: /v2/children/{object\_id}
A measuring point is of the object\_type = attribute. This means that if you query a child object of this type, you can also access the data directly with the ID of the respective object without a custom key / alias.

Where to include the id:

## LineMetrics Authentication
To authenticate LineMetrics, please ask your account manager or technical contact for a API ID and API Secret. This can be included on Locoia. Further details can be found here from [LineMetrics](https://rest-api-doc.linemetrics.com/v2/#oauth2-client-credentials) directly.

[Locoia ConnectorAuth general docs](/connectors/authentication/setting-up-authentication)
[Overview of LineMetrics](https://www.locoia.com/connector/linemetrics-integration)
# Linkedin
### Authentication
To grant full access rights, go to this url --> Replace the id (123456789) with your page id and make the user that is supposed to access data, `Super admin`

# Locoia
Locoia Connector
The Locoia Connector can be used to interact directly with it's API to e.g. request a current Flow Run status from a third party app.
[Authentication is done via Personal Access Tokens](/api/authentication-with-our-api).
# Notion
Information about our Notion Connector
You can access your Notion [pages](https://developers.notion.com/docs/working-with-page-content) and [databases](https://developers.notion.com/docs/working-with-databases) through our software and dynamically create new ones.
If you like to connect to Notion please create an [Authentication](https://app.locoia.com/settings/connector-auth/). A popup will open. After logging in with your credentials you will be asked for permissions:
After clicking an **Select pages** you will be forwarded to the next page. There you can select the pages from your workspace that you like to connect.

{% hint style="warning" %}
If you create new pages on top level of your workspace (pages having no other parent than the workspace), then you need to create a new authentication or edit the existing one and select those pages. Otherwise they will not be accessible through Locoia.
{% endhint %}
# MailGun
Common Links
* [Authentication](https://documentation.mailgun.com/en/latest/api-intro.html#date-format) docs and private [API keys within the app](https://app.mailgun.com/app/account/security/api_keys).
* Base domains
* Globally
* EU
* Current version is /v3/
# Makula
makula.io
### Authentication
Makula uses 2 tokens. One short lived and a refresh token. When the short-lived token expires. Makula checks the validity of the refresh token and refreshes both tokens if it is valid. Expiration is:
* Short-lived token: 6 minutes
* Refresh token: 7 days
Both tokens are sent from the client to the server. Server send tokens to the client only after login or if they get refreshed.
Base domains:
* Production
* Staging
### Manipulating requests
#### 1. Pagination
Makula uses filter on queries with skip and limit like MongoDB.
#### 2. Sorting
One can sort by multiple fields.
#### 3. Filtering
Filtering works with: sort, skip, limit, ne, gt, gte, lt, lte, in, nin, contains, matches
### Further information
Makula uses roles and permissions that are not documented on the API endpoints yet. For example only certain roles can perform specific queries or mutations.
---
[Next Page](/llms-full.txt/1)